Accessing the Course Authoring Tool
Navigate to the Course Authoring tab by selecting it from the left sidebar.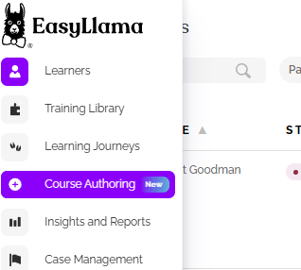
You will see two tabs - My Courses and Templates.
My courses is where the courses you create will appear!
Templates is where you can find premade templates that can be used as a starting point for a course. You will also find our customizable Workplace Violence Prevention courses.
Did you know? There's a 10-minute course you can assign to yourself and other admins called "Learn How to Create Engaging Training with The Course Authoring Tool" Search for it in the training library or find a link to it in the sidebar of the Course Authoring tab for a quick overview!
Next we will go over how to create a brand new course - you can get started by clicking "Start here" on the Create a new course tile or by clicking the purple Create Course button at the top-right! 
2. Creating a New Course
Step 1: Choose Your Input Method
- Select the Create a New Course tile and choose from multiple ways to start:
- From a prompt: Describe the course you'd like to create with the option to add a PDF of reference material and add knowledge checks - Ai will fill in the details! don't worry, you'll be able to review, edit, and add to the generated information.
- Upload a PDF: Use your existing training materials and choose whether to directly convert them to a course or use our powerful Ai toll to transform your PDF into an EasyLlama-style course that you will be able to edit and change as you wish!
- Upload SCORM: If you already have third-party courses in SCORM format that you don't need to edit or customize, you can upload them here and use EasyLlama as your LMS.
- Start from scratch: Build your course slide by slide, similar to PowerPoint or Google Slides but with the style you know from EasyLlama's courses!
- From a Template: Click on a Customizable Compliance Training template and then click "duplicate" to get started - it will duplicate the template for you and can then click "Continue Editing" at the top-right to customize it. Each slide will have prompts regarding what you might add to them.
To customize a Workplace Violence training, click on a template and you'll see a How-to video. Review the video and then get started - you'll be guided through filling out the template to customize your Workplace Violence course! You can find more information on how to customize the Workplace violence template here: Worklplace Violence Course Customization
Step 2: Input Your Course Details
- To create a course using a prompt:
- Enter a description, e.g., "Create a course on CPR training." You can try adding descriptors like "Humorous" or "brief" or describe specific topics or details you would like to include.
- Upload a reference PDF if needed.
- Toggle on Knowledge Checks to include quizzes for better engagement.
Step 3: Generate Your Course
- Click Create Course.
- Wait for the confetti! The course will be generated in 1–2 minutes. When it's done click "Review & Edit."
**Don't worry - if you closed out before the course was completed, you can find your course and click on it under Course Authoring > My courses - you'll be able to continue editing from there!
3. Editing Your Course
Slide Management
- Use the left sidebar to view and organize slides and chapters.
- Rename, duplicate, delete, or rearrange slides as needed - You can drag and drop chapter names to reorder them or click the three dots on each section name to delete or rename them. For sections (Not chapters) you can also duplicate them

- Click the Add New button
 at the top of the navigation menu to add a new Chapter or Slide. They will appear at the bottom of the menu, but they can be dragged or dropped where you would like to insert them - and the numbering (Chapter 6, Chapter 7, etc.) will update automatically.
Text Editing
- The editor allows you to easily modify text on slides - just click on the text box on any slide to edit the text.
- Drag your cursor over text to highlight the text and Use AI-powered tools to:
- Fix spelling or grammar.
- Shorten, lengthen, or simplify text as needed.

Interactive Features
- Add quizzes tailored to your learners' needs, whether for specific roles or organizational requirements.
- Edit quiz text, questions, and answer choices to make them relevant.

- Add new quizzes by clicking the Add New
 button at the top of the menu and choosing a quiz template:
4. Adding Media and Enhancing Engagement
Images
- Add or replace images using the Media Editor. Click the small pencil icon
 at the top-right of the slide to add images. You'll be able to :
- Upload your own images.
- Search for relevant images from extensive Unsplash library
- Use Images from the EasyLlama Library
- Generate new images using AI.

Videos
- Upload custom videos to enhance your slides - you will need to click the Add New button
 at the top of the navigation menu to add a video slide. You will see options to pick a template - scroll down and click on "Media Templates" and choose the Full Screen Video Option > Add > Click the Edit Pencil icon
  > Upload a video or choose one from the Pexels library > Click "Select" on the video to add it to the slide
Interactive PDFs
- Integrate case studies, handbooks, or policies directly into your course by adding an Interactive PDF Slide.
- Upload PDFs and edit accompanying text to guide learners.
- Click the Add New button at the top of the navigation menu to add a video slide. From the Text Templates section choose "Interactive PDF" > Add > follow the instructions on the slide to replace the instructions PDF with your own! Learners will be able to scroll through the document, download it, and print it.
Sound and Narration
- Click the audio button at the top-right of any slide to add narration here:

- Upload an Mp3 or generate narration with Ai - you can just type in the narration and choose a voice and it will be played for the slide you add it to! Try different characters and regenerate until you find one you like - you'll be surprised by how un-robotic they sound! 🤖

5. Previewing Your Course
- Preview your course to see exactly how it will appear to your learners.
- Use the Preview button in the upper right corner to test navigation and content fidelity.

- When you are done previewing, close the preview to continue editing or to publish the course.
6. Publishing and Assigning Your Course
- Once satisfied, click Publish at the top-right of the course to add the course to your Easy Llama library.
- If you are ready to assign the course, you can do so as soon as you click "Publish" you will have an option to search for Learners one at a time to assign the course, but if you want to assign to more than a few Learners, we'd recommend bulk assigning it.
- You'll also see options to recommend (it will appear a s a recommendation in the Learner portal); Share a Preview (You can enter an email to have a demo sent), or Add to favorites to make it easy to find when assigning courses!
- After publishing the course, you can still make edits - just go to Course Authoring > My courses and click the three dots to see your options!

7. Continuous Improvement
- Easy Llama is committed to adding more templates and features based on your feedback.
- Stay tuned for updates to make your course creation experience even better!
Final Thoughts
Easy Llama’s course authoring tool provides a simple yet powerful way to create professional, engaging training materials. Whether you’re starting from scratch, using generative AI, or repurposing existing content, this tool has you covered.
Now it’s your turn—start crafting amazing courses, and don’t forget to share your feedback with us. Happy course building!