Before You Start
What You'll Need
- Administrative access to the dashboard
- A published course created in the Course Authoring Tool
- Target languages selected from the supported list
- Understanding of translation workflow
- Access to the LMS & built-in AI Course Authoring Tool and published courses
Quick Reference
- Supported content: Courses created in the Course Authoring Tool only
- Languages: 30+ supported languages (see full list below)
- Workflow: Enable → Generate → Review → Update
- Key feature: Auto-update helps keep translations in sync when English content changes, without overwriting manual edits
Enable Translations for a Course
Step 1: Publish the course
Translations cannot be added to draft courses. You must publish the course before generating translations.
To check if a course is published:
- Log into the Dashboard.
- From the left navigation menu, click Trainings > Course Authoring.
- Find the course you’d like to translate.
- On the course card, check that it is not in Draft. If it is, click the 3-dot icon > Publish.
Step 2: Access translation options
Click on the course to access the published course page. Using the three dot icon, click Add Translations.
Enable, edit, and maintain AI-generated translations for courses created in the Course Authoring Tool, making training accessible in 30+ languages for your global workforce.
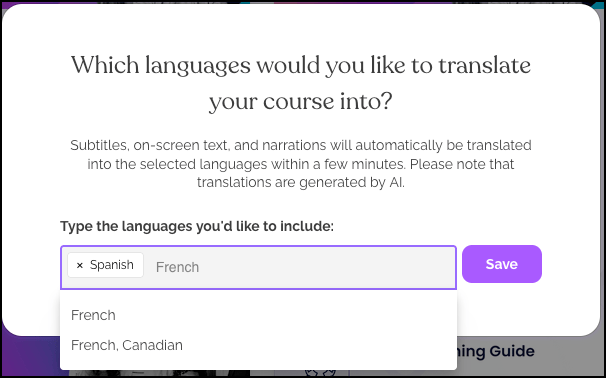
Step 3: Select target languages
Choose one or more languages from the 30+ supported options:
Complete Supported Language List:
- Spanish (Spain)
- Spanish
- Chinese (Simplified)
- Chinese (Traditional)
- French
- French (Canada)
- Vietnamese
- Japanese
- Korean
- German
- Portuguese (Brazil)
- Portuguese
- Polish
- Russian
- Hindi
- Arabic
- Danish
- Italian
- Slovak
- Swedish
- Ukrainian
- Dutch
- Afrikaans
- Greek
- Punjabi
- Indonesian
- Latvian
- Turkish
- Welsh
- Urdu
- Thai
- Swahili
- Nepali
- Icelandic
Need another language? Contact your Customer Success Manager.
Once the language is selected, click Save.
Step 4: Generate translations
The translations are generated in the background. Processing for 1-2 languages typically takes several minutes but varies by course length and language count.
Monitor progress:
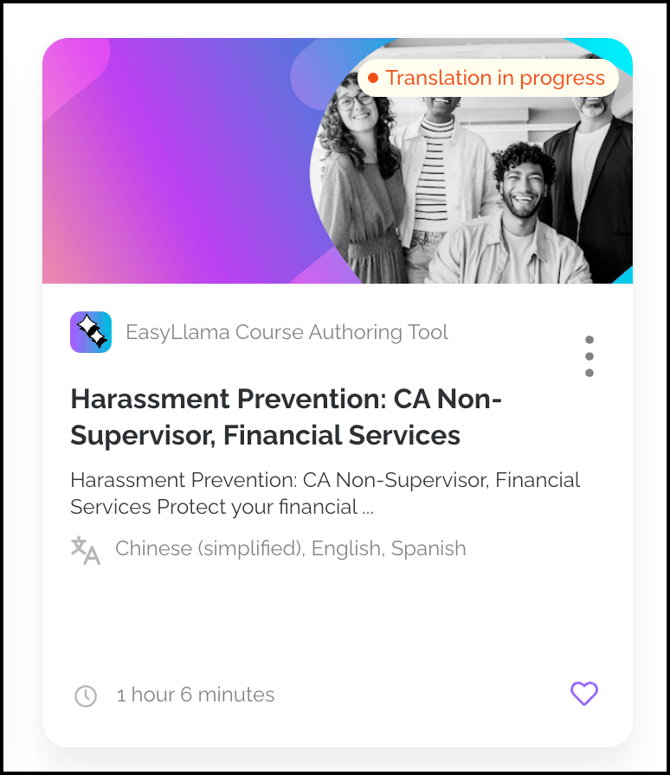
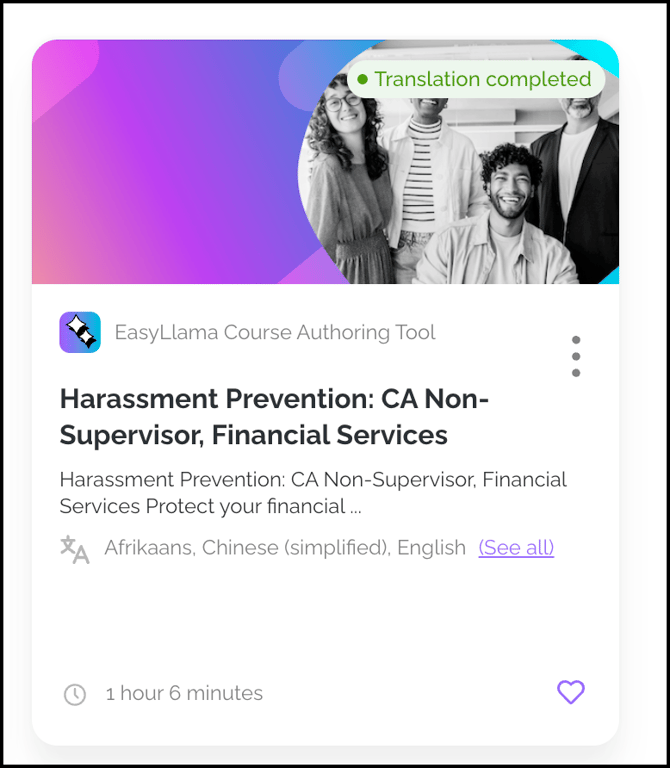
- "Translation in progress" appears on course card during generation
- Email notification sent upon completion to the Admin
- Status disappears after page refresh when complete
Helpful Tip: Wait for initial translations to complete before submitting another translation. Translations run one language at a time for each course, so if you add more languages before the first set finishes, it can slow processing down.
Review and Edit Translations
To update translations after launching a course, either to customize wording, or to spot check AI translation, take the following steps. Prefer a video? Click here.
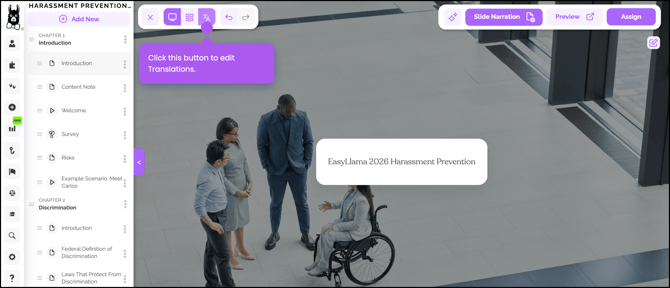
Step 1: Access Translations Console
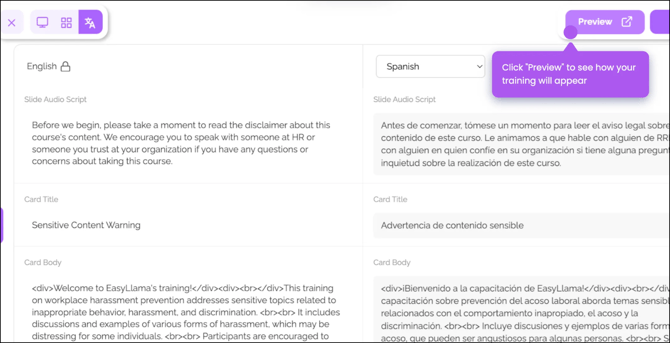
Open the course and click the Translations button to enter the Translations Console.
Step 2: Select language to review
Use the drop down to select which language to examine. Each language must be reviewed separately.
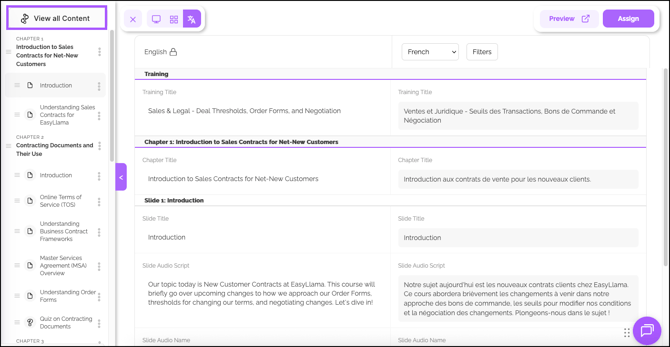
Step 3: Use side-by-side view
The console shows:
- Left panel: Source English content
- Right panel: AI-generated translation
- Navigation: Browse slides individually or use View all Content
Step 4: Make manual edits
Edit directly in the translation panel to:
- Correct AI translation errors
- Apply organization-specific terminology
- Improve clarity or cultural appropriateness
- Ensure compliance language accuracy
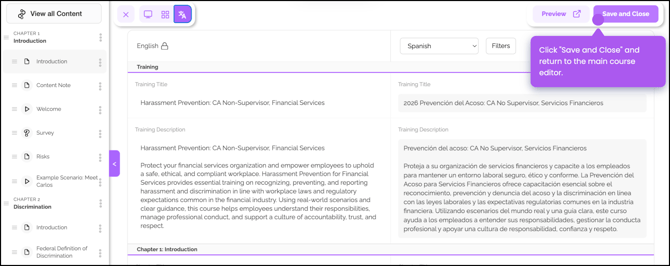
Step 5: Save changes
Click Save and Close to preserve manual edits. These translations are marked as "Manually Translated."

Update Translations After Source Changes
Changes made to the course’s English version will temporarily cause translations to be out of sync.
If you update the English content, you’ll need to regenerate translations to see them in Preview Mode. Otherwise, Preview will continue to show the English version.
To review updated translations in Preview Mode while still editing and making changes, you must manually generate translations.
Step 1: Make content changes
Use the course builder to make changes to the content.
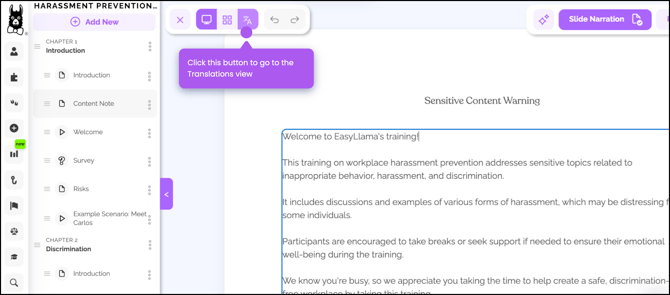
Step 2: Go to the Translations view
From the course editor, click Translations to view the translation status for each language.
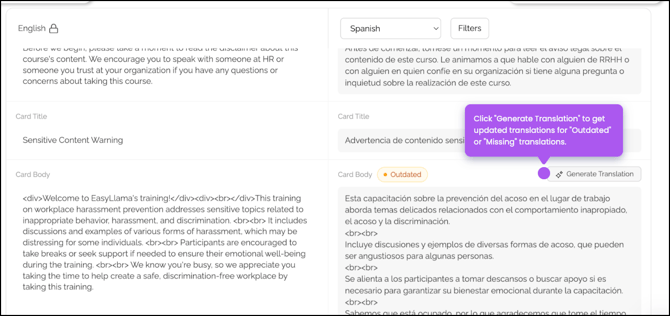
Step 3: Filter Content
Use the Filters to find outdated or missing content.
- Helpful Tip: Click View all content to view all missing or outdated content across slides.
Step 4: Generate new content
For each outdated or missing section, click Generate Translation. This step must be completed for each language you want to preview. Use the language drop down to move between languages.
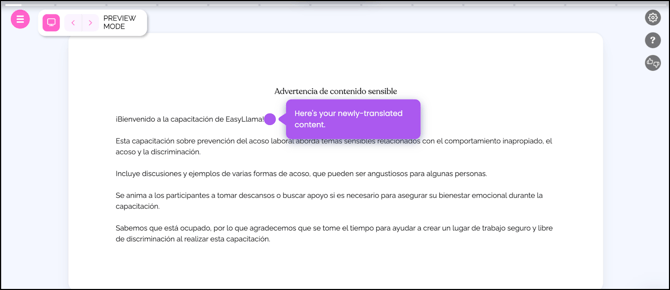
Step 5: Preview Content
Once the content is generated, the updated content is available immediately. Click Preview and toggle to the desired language.
Step 6: Save and Close
When the translation process is complete, return to the Course Builder and click Save and Close.
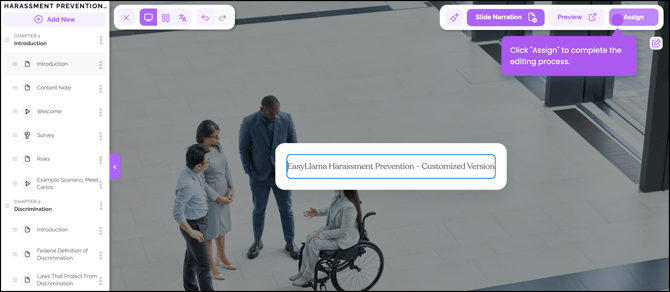
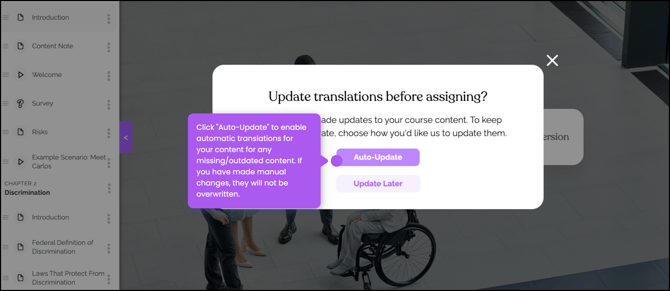
Step 7: Assign the Course
Once all editing is completed, and you're ready to deploy the courses to learners, click Assign.
The following message appears to handle any missing or outdated translations:
- Auto Update - Enables automatic AI translations for missing or outdated translations. Previously made manual translation changes are not overwritten.
- Update Later - Any content detected missing or outdated will not be upgraded by AI, which may cause English or outdated content from previously generated translations to appear instead.
Translation Management Features
Filter System
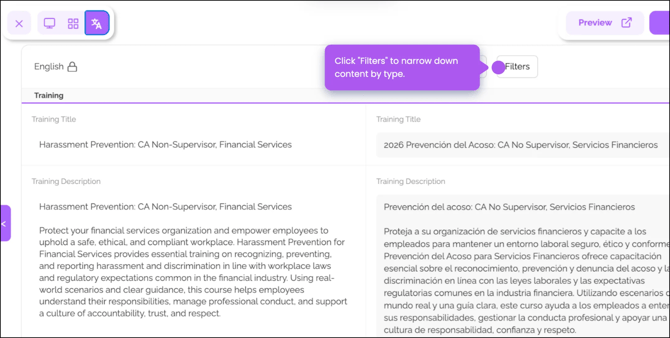
Available filters in Translations Console:
- Missing: New content needing translation
- Outdated: Edited content needing re-translation
- Manually Translated: Admin-edited translations
- Auto Translated: AI-only translations
- Images: Image alt text for accessibility
Use "View all Content" to filter across entire course.
Non-Editable Translation Types
Cannot be manually edited:
- Audio clips (card audio, narrations)
- Video subtitles
To update these:
- Edit English source media
- Use "Auto-Update" option
- AI regenerates audio/video subtitle translations
- Updated versions apply on next assignment
Learner Experience
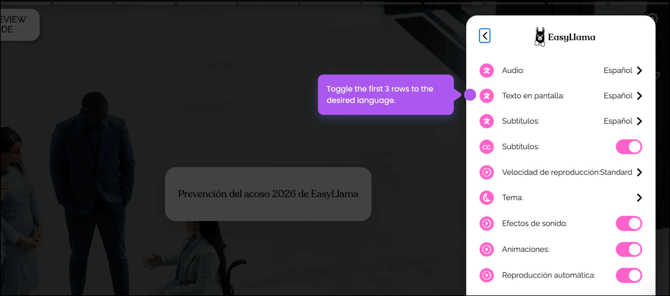
Language selection
Once translations are complete and enabled in course settings:
- Language toggle appears in course interface
- Learners select preferred language
- All translated elements display in chosen language
Immediate access
- No admin action required after translation completion
- All enabled languages are available simultaneously
- Learners can switch languages during the course
Helpful Tips
Avoid adding languages before initial translations are complete
Wait for the first batch to finish processing before adding more languages to avoid system conflicts.
Use Auto-Update after content changes
Select "Auto-Update" when prompted after editing English content to ensure translations stay synchronized.
Understand that not all content types are editable
Audio and video translations cannot be manually edited. Use Auto-Update to regenerate these after changes.