If your organization uses Okta to manage your employees’ access to tools and services, you can take advantage of Okta’s “Provisioning” feature to automatically grant access to EasyLlama to your admin users and learners.
The integration between Okta and EasyLlama that enables this provisioning to occur is built around an industry-standard protocol known as SCIM (System for Cross-domain Identity Management). To learn more about how Okta works with SCIM, please see this article.
Additionally, Automations apply to SCIM-updated learners to automate actions such as assigning a course when a new learner is added, or assign a leadership course when a learner is promoted to supervisor. See this article for more details about EasyLlama's Automations.
The remainder of this guide is focused on enabling you to configure both EasyLlama and Okta to get provisioning up and running for your organization.
Supported features:
- Create admin users / learners
- Update admin users / learners attributes
- Deactivate admin users / learners
Step-by-step configuration instructions
1) Click “Applications” > “Applications” > “Browse App Catalog“ (If you already have EasyLlama as an application, click on it).
- Search for "EasyLlama"
- Click Add
- Click Done
2) Click the “Provisioning” tab and click “Configure API Integration“
3) Next, click the checkbox “Enable API Integration“.
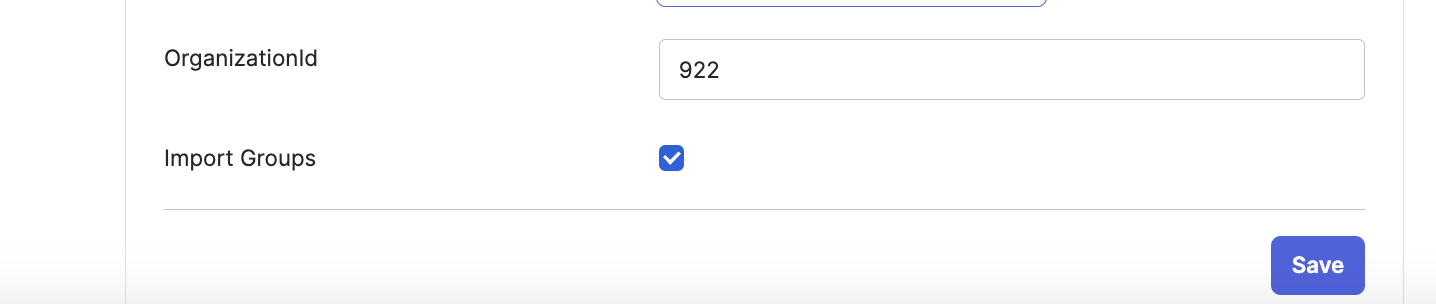
4) Under the “Provisioning” tab, your EasyLlama organization ID and click "Save".
Your EasyLlama organization ID will be provided by your customer success team.
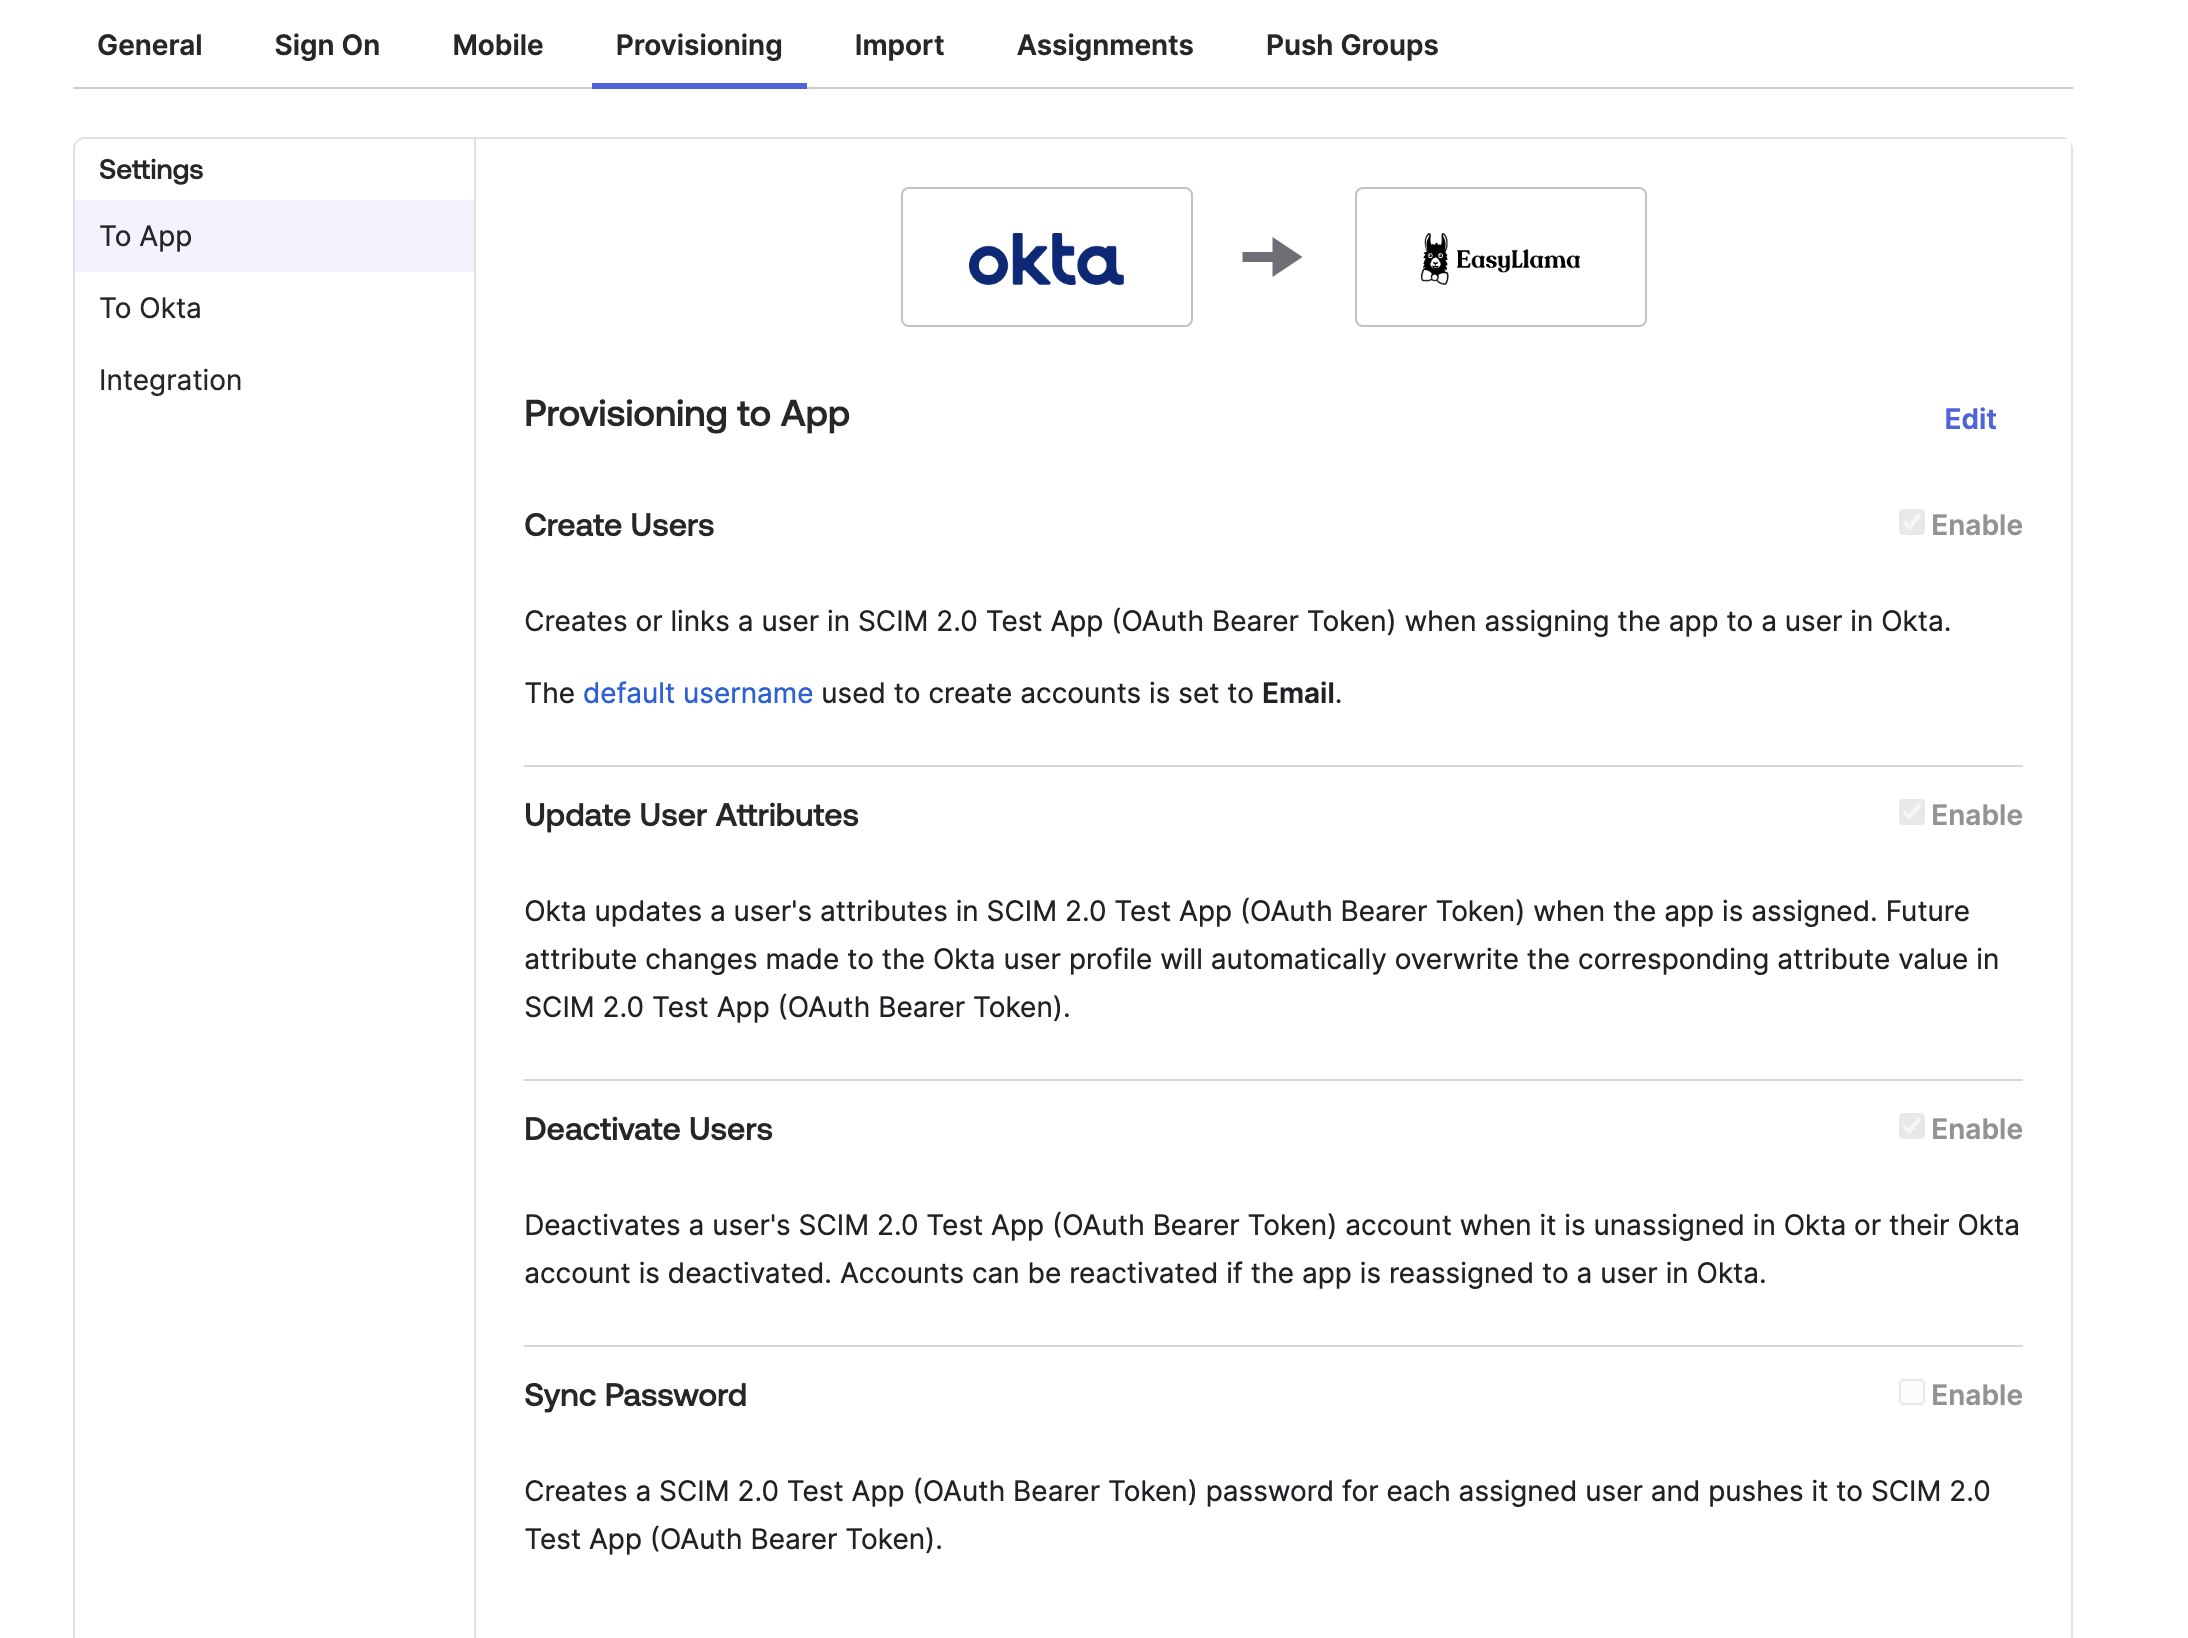
5) Next, on the “Provisioning” tab click “To App” and click “Edit“
6) Check each box for EasyLlama’s supported provisioning actions:
- Create Users
- Update User Attributes
- Deactivate Users
Click "Save".
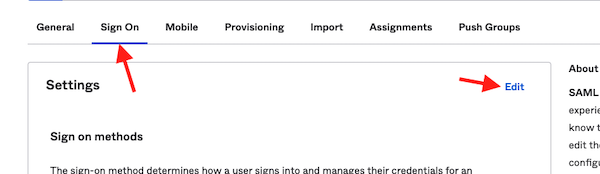
9) Next, click the tab for “Sign On” and click “Edit“
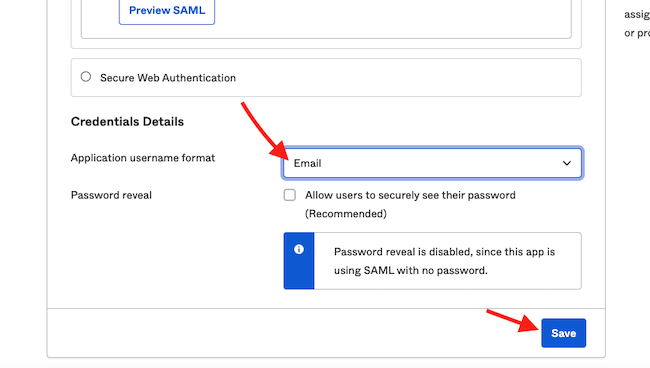
10) Select Email for the Application username format and click “save”
How to provision learners or admins into EasyLlama
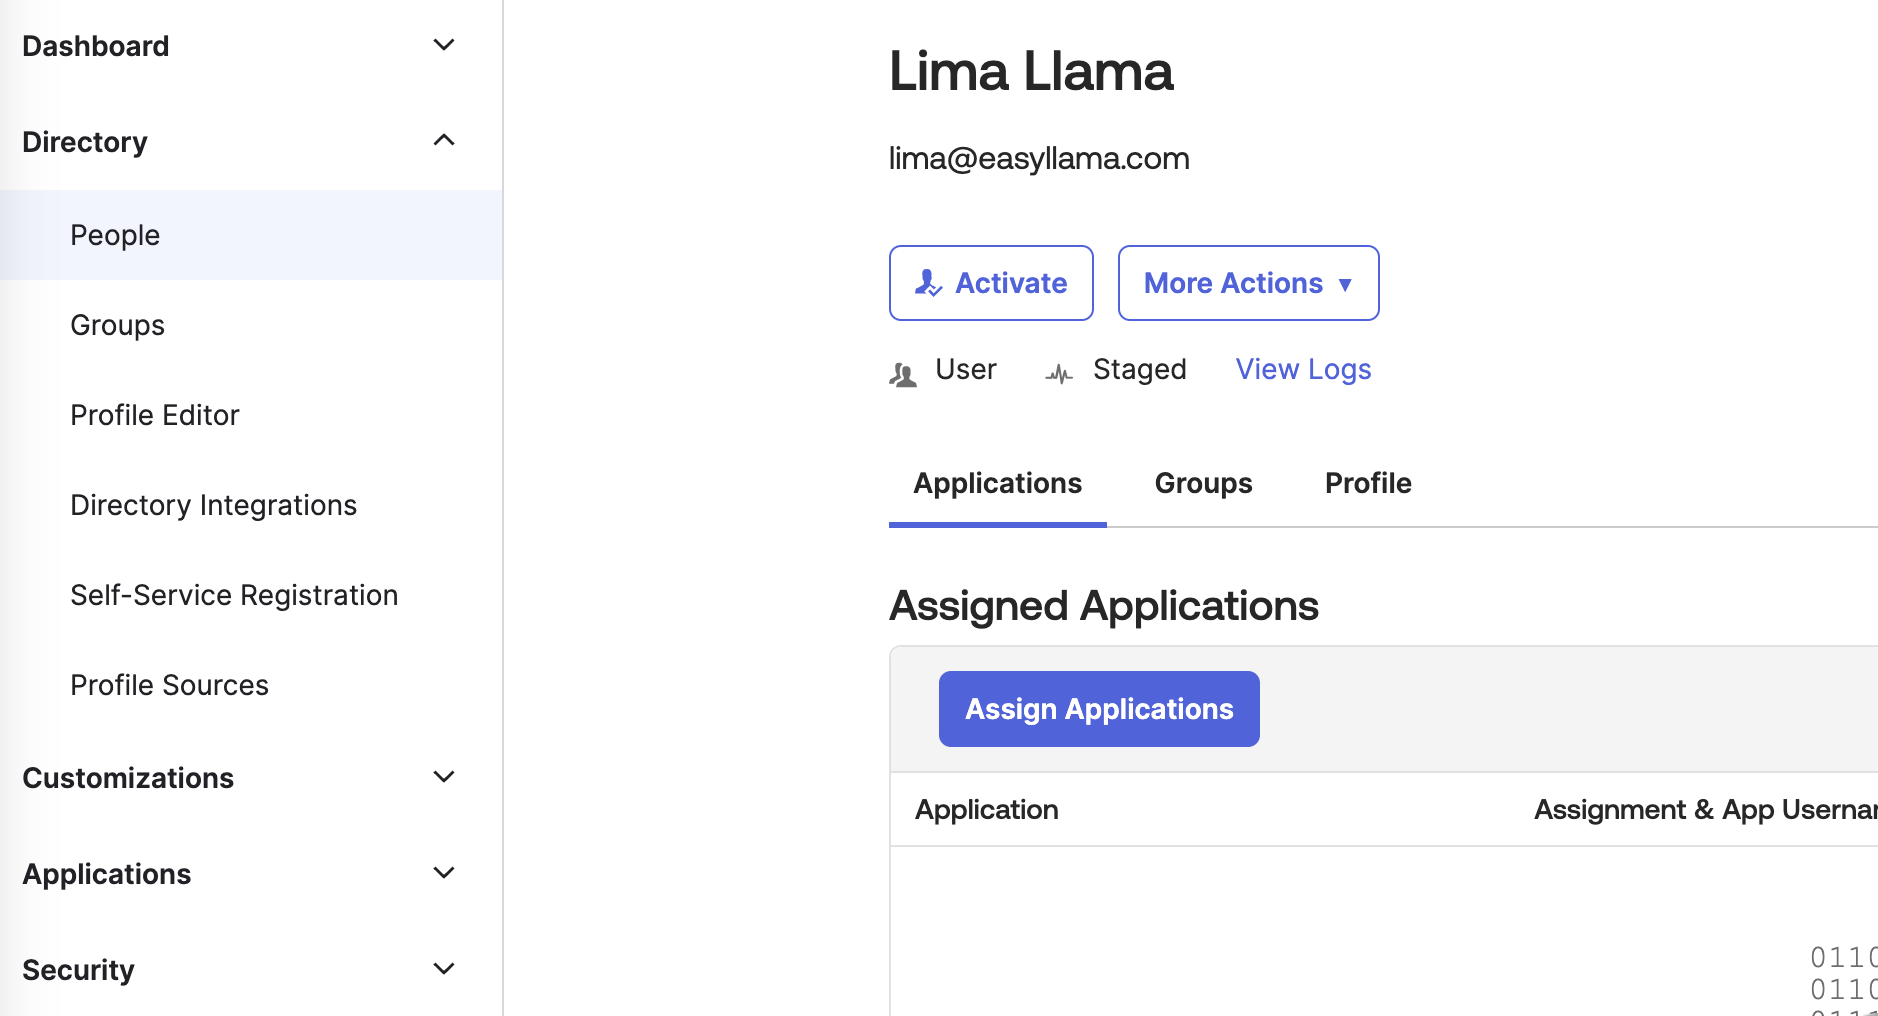
1) In Okta, go to Directory > People
2) Add a new user or select an existing one
3) Click "Assign Applications" and select the application you just installed, "EasyLlama SCIM".
4) A form will appear. You can also enter the "User Type" such as "admin", "learner" or both "admin, learner".
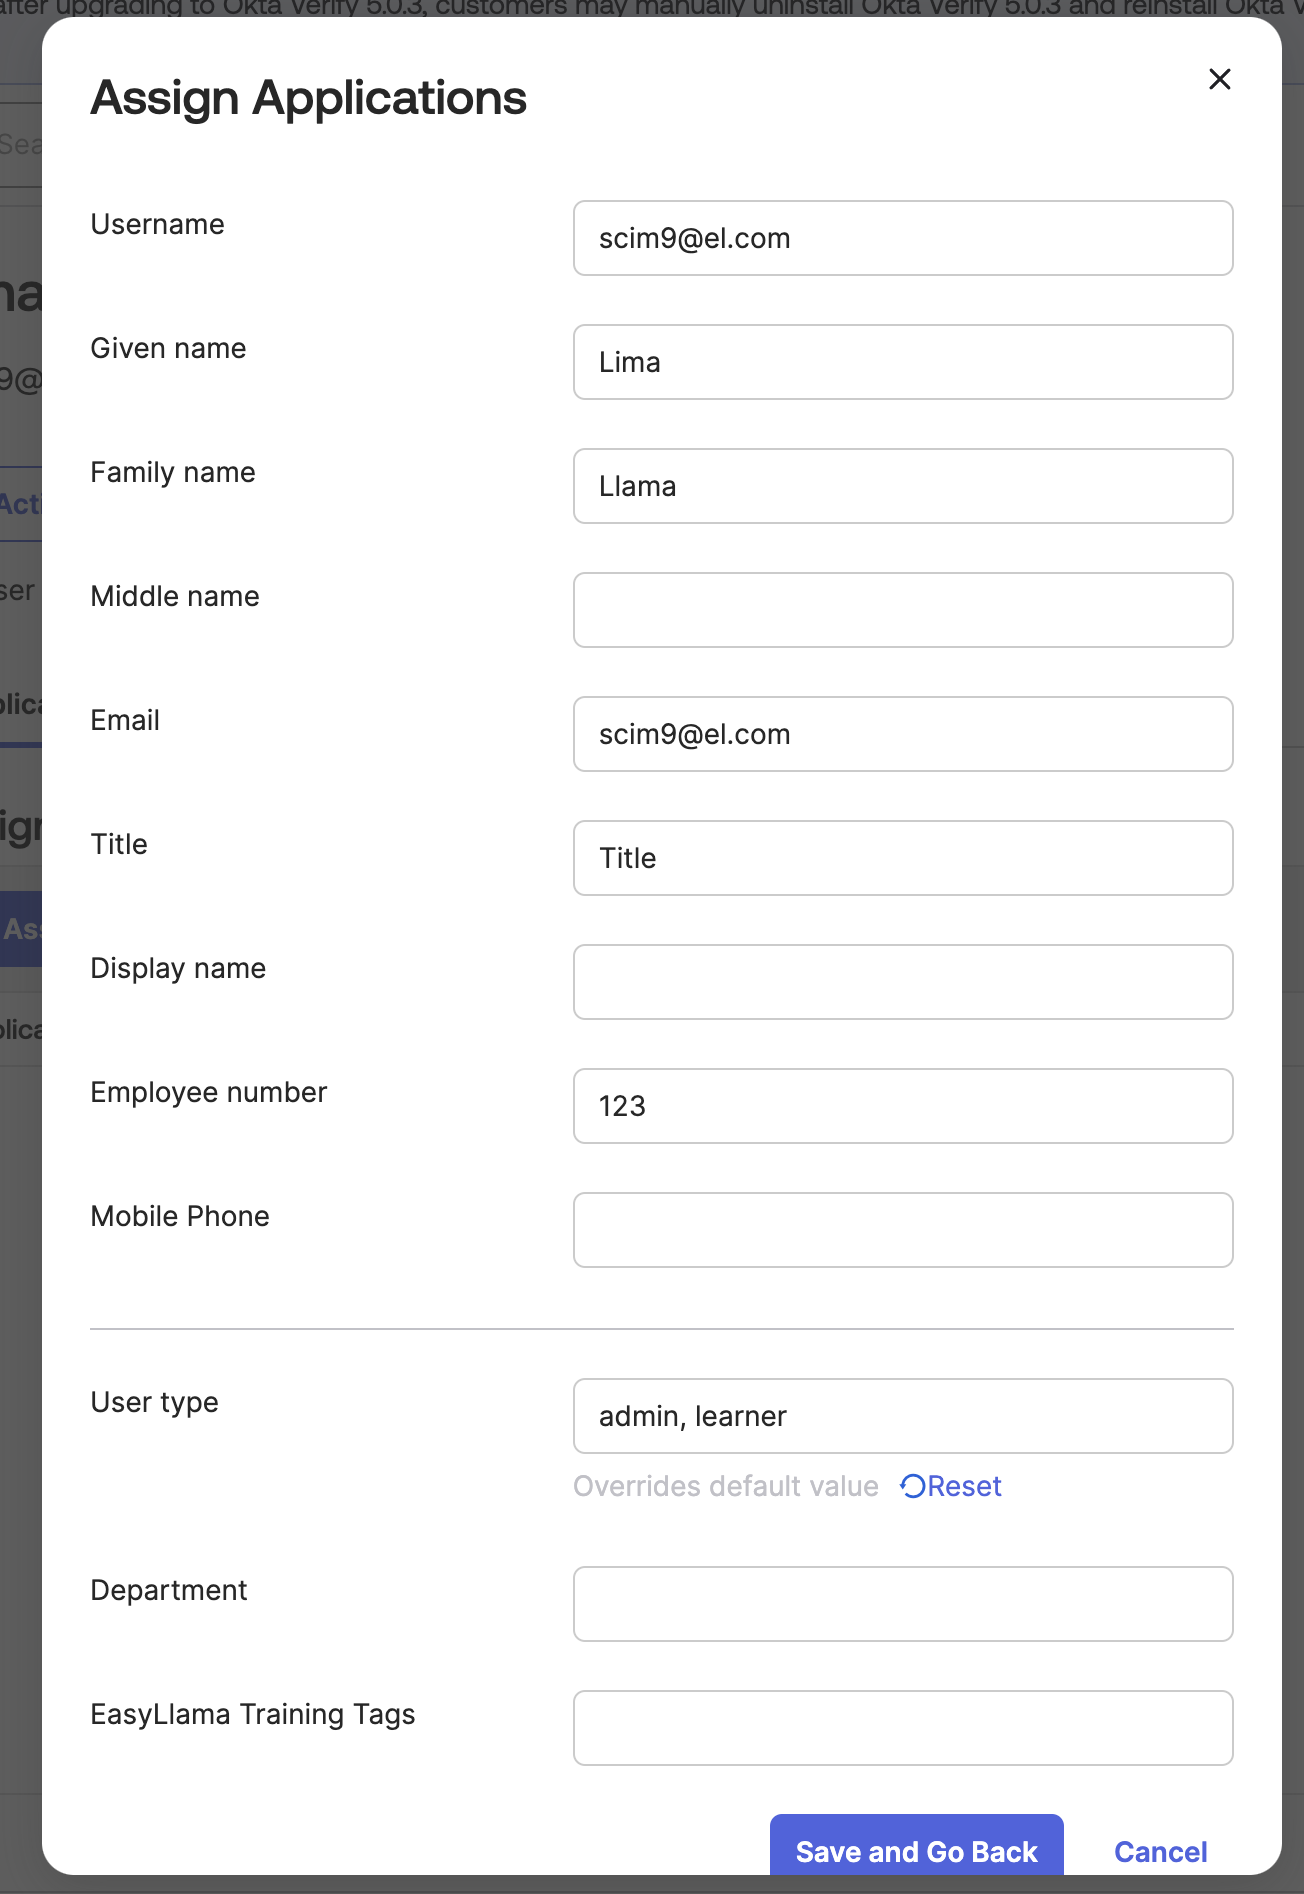
5) Click "Save".
6) Learners will be provisioned in your EasyLlama account and will be assigned training courses (if selected).
To automatically assign training courses when provisioning learners
You can assign courses to learners when they are provisioned through Okta SCIM for the first time (new learners only). To do this, follow these steps to add a training_tags column in the Okta profile editor:
1) After having installed the EasyLlama Okta app, go to Directory > Profile Editor
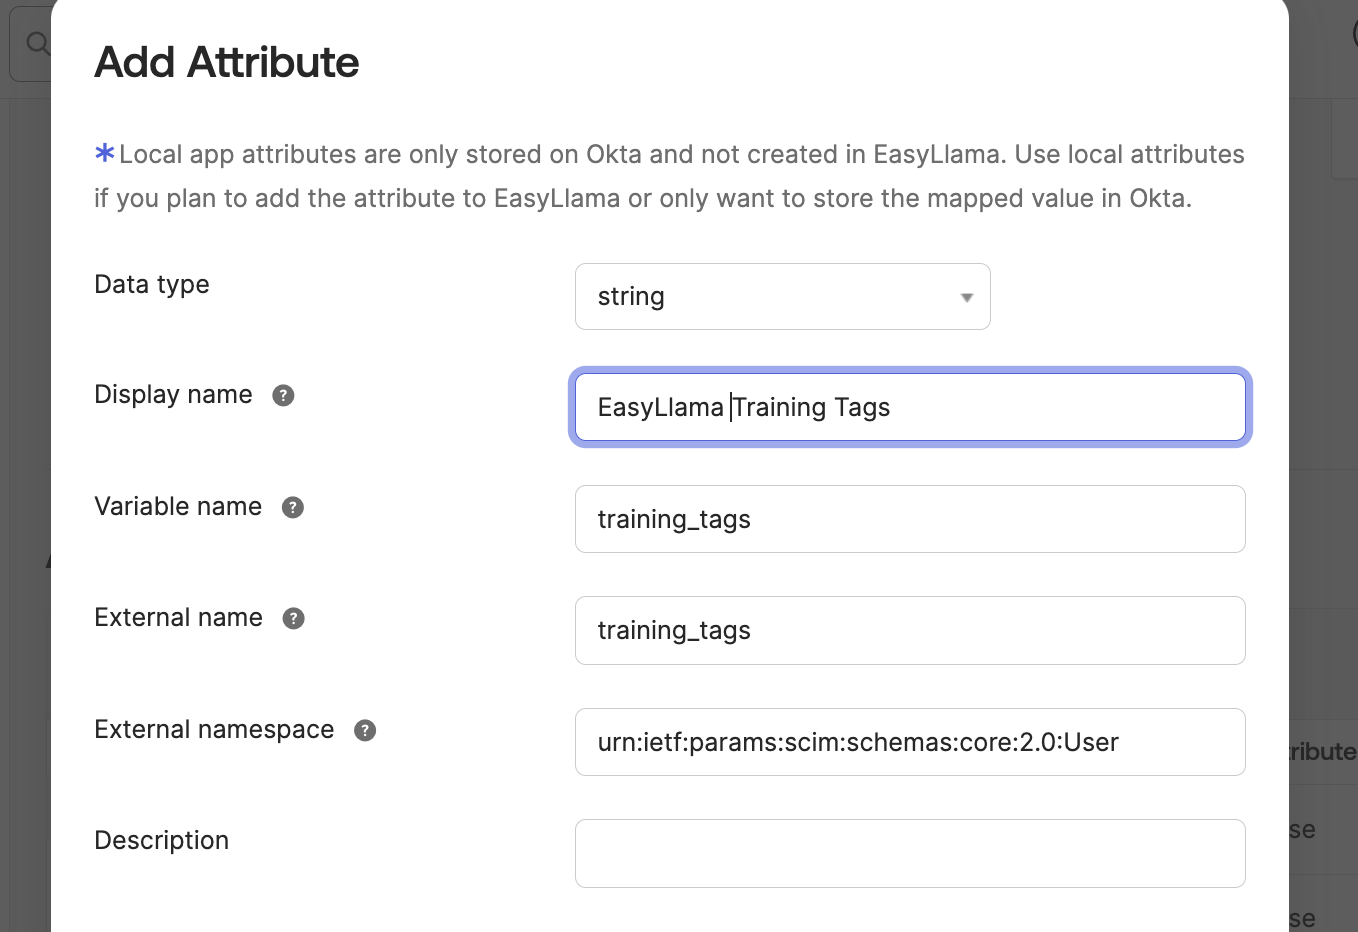
2) Click on "Add Attribute" and enter the following information:
- Display name: EasyLlama Training Tags
- Variable name: training_tags
- External name: training_tags
- External namespace: urn:ietf:params:scim:schemas:core:2.0:User
Then click "Save".
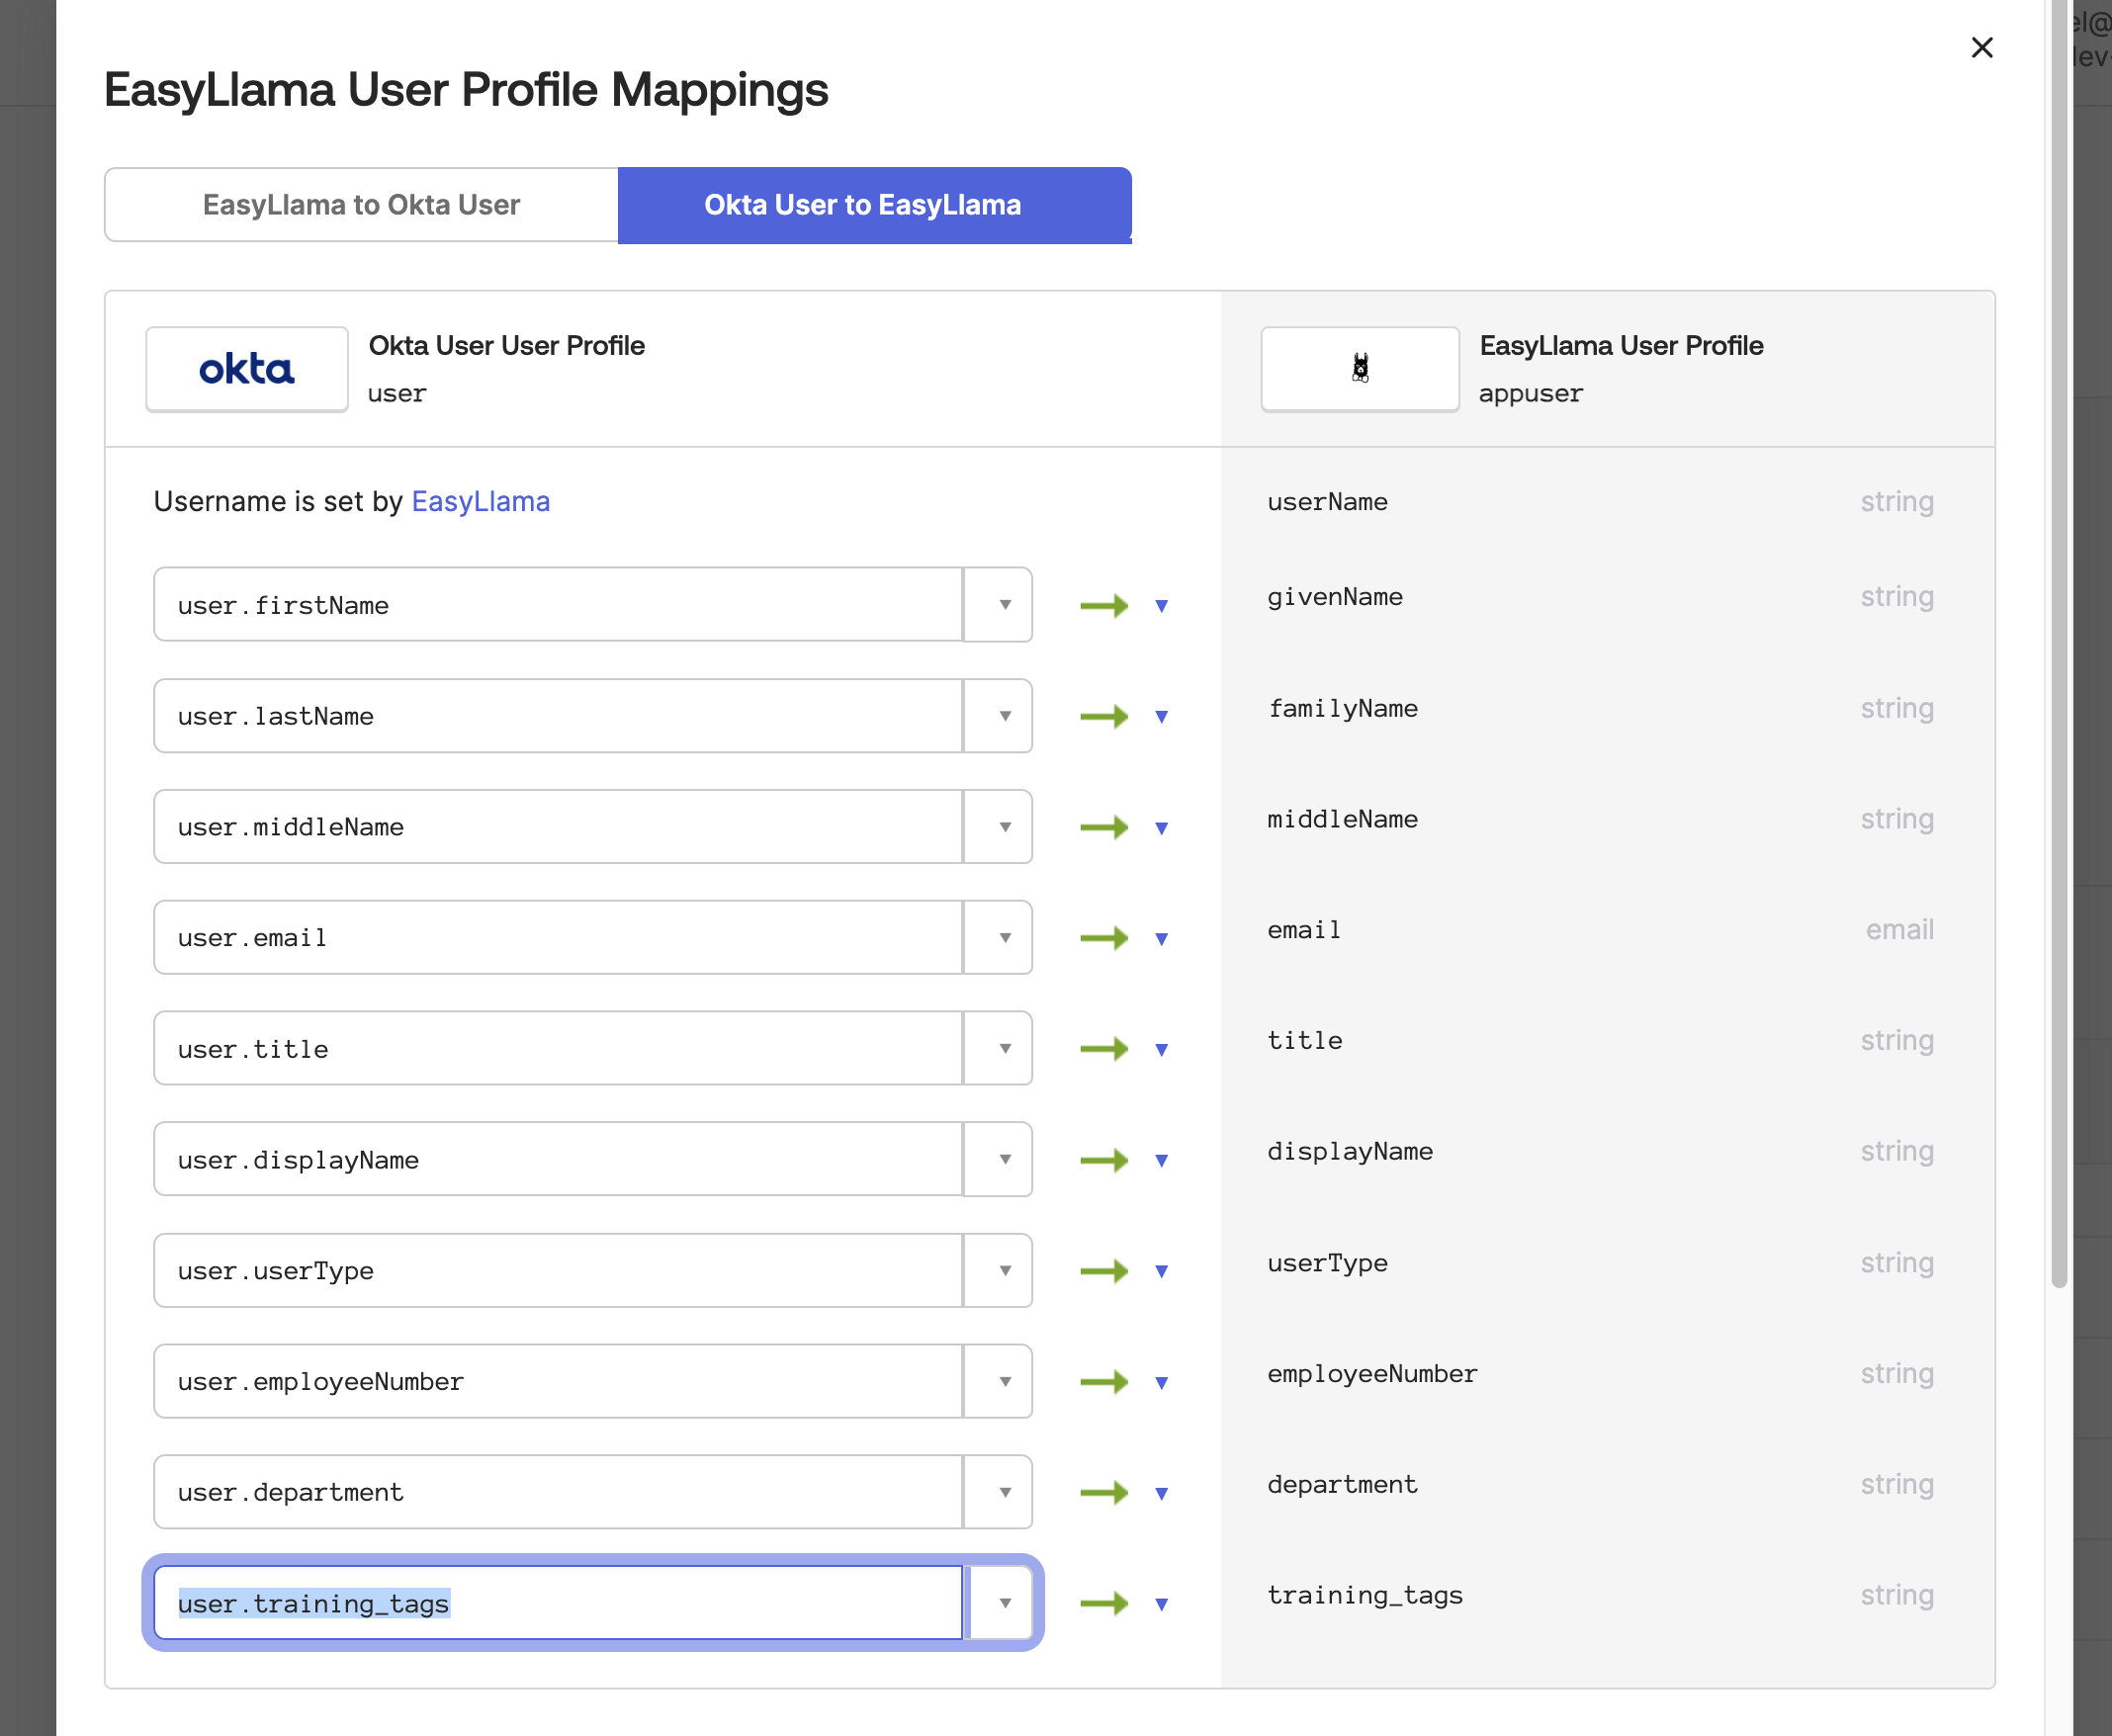
3) (optional) To map your core User fields to the EasyLlama app, click on "Mappings", then on "Okta User to EasyLlama" and map your user field to the EasyLlama training_tags. Click "Save".
4) When provisioning a new user in Okta and assigning them the EasyLlama app, you will have the opportunity to enter the EasyLlama training tags to automatically assign specific courses to learners. For example, you can enter the hp-self-select code to assign the Harassment Prevention Training Self-Select. Since these tags were previously only used for file uploads/feeds, they are located under File upload information in the dashboard. You can find instructions here to locate them: Adding Learners using the File Upload Method -> How to get the Training Codes/Learning Journey codes.
5) That's it! New learners should appear in your EasyLlama dashboard with trainings assigned.
Additional Learner Profile Configuration (Optional)
Additional user attributes from SCIM can be set up and mapped to EasyLlama:
- Title
- Role
- Department
- Location
- Region (Country and State)
Title
- Go to Okta > Directory > Profile Editor > EasyLlama App
- Add Title if it isn't already an attribute in the EasyLlama App
- Variable name:
title - External name:
title - External namespace:
urn:ietf:params:scim:schemas:core:2.0:User - Click Save
- Variable name:
- Map Title from Okta to EasyLlama
- Click Mappings in the Profile Editor for the EasyLlama App
- Select the tab Okta User to EasyLlama App
- Map
user.titletotitle
Role
- Go to Okta > Directory > Profile Editor > EasyLlama App
- Add Role if it isn't already an attribute in the EasyLlama App
- Variable name:
learnerRole - External name:
learnerRole - External namespace:
urn:ietf:params:scim:schemas:core:2.0:User - Click Save
- Variable name:
- Go to Okta > Directory > Profile Editor > Okta User
- Add Role if it isn't already an attribute in Okta
- Variable name:
learnerRole - Define enumerated list of values: true
- Display name and Value:
non-supervisor - Display name and Value:
supervisor
- Display name and Value:
- Click Save
- Variable name:
- Map Role from Okta to EasyLlama
- Click Mappings in the Profile Editor for the EasyLlama App
- Select the tab Okta User to EasyLlama App
- Map
user.learnerRoletolearnerRole
Department
- Go to Okta > Directory > Profile Editor > EasyLlama App
- Add Department if it isn't already an attribute in the EasyLlama App
- Variable name:
department - External name:
department - External namespace:
urn:ietf:params:scim:schemas:extension:enterprise:2.0:User - Click Save
- Variable name:
- Map Department from Okta to EasyLlama
- Click Mappings in the Profile Editor for the EasyLlama App
- Select the tab Okta User to EasyLlama App
- Map
user.departmenttodepartment
Location
- Go to Okta > Directory > Profile Editor > EasyLlama App
- Add Location if it isn't already an attribute in the EasyLlama App
- Variable name:
location - External name:
location - External namespace:
urn:ietf:params:scim:schemas:extension:enterprise:2.0:User - Click Save
- Variable name:
- Go to Okta > Directory > Profile Editor > Okta User
- Add Location if it isn't already an attribute in Okta
- Variable name:
location - Click Save
- Variable name:
- Map Location from Okta to EasyLlama
- Click Mappings in the Profile Editor for the EasyLlama App
- Select the tab Okta User to EasyLlama App
- Map
user.locationtolocation
Region
Region is calculated in EasyLlama from the SCIM attributes for Country and State, not from a Region attribute.
Country
- Go to Okta > Directory > Profile Editor > EasyLlama App
- Add Country if it isn't already an attribute in the EasyLlama App
- Variable name:
country - External name:
addresses.^[primary==true].country - External namespace:
urn:ietf:params:scim:schemas:core:2.0:User - Click Save
- Variable name:
- Map Country from Okta to EasyLlama
- Click Mappings in the Profile Editor for the EasyLlama App
- Select the tab Okta User to EasyLlama App
- Map
user.countryCodetodepartment
State
- Go to Okta > Directory > Profile Editor > EasyLlama App
- Add State if it isn't already an attribute in the EasyLlama App
- Variable name:
state - External name:
addresses.^[primary==true].state - External namespace:
urn:ietf:params:scim:schemas:core:2.0:User - Click Save
- Variable name:
- Map State from Okta to EasyLlama
- Click Mappings in the Profile Editor for the EasyLlama App
- Select the tab Okta User to EasyLlama App
- Map
user.statetostate
Note
For admin users: first names, last names and email addresses are required
For learners: first names and last names are required