Section 1: Customizing Learning Journeys
Prebuilt Journey settings cannot be changed, but if you can't find exactly the Journey you want, you can create your own by using one of our Journeys as a template, or by creating your own from scratch! You'll be able to add or remove courses, change the timing, and more.
Customizing a Prebuilt Learning Journey
New Feature: The delay between courses may now be changed for both custom and pre-built Learning Journeys! Just click the drop-down to change it. Your change will be saved automatically. For Learners who are already enrolled, if you choose a delay that is shorter than the elapsed time since their last course, it will be assigned within 24 hours. If you select a longer delay, it will also apply to them and assign the course per the new schedule.
If you like one of our prebuilt Learning Journeys but would like to make some minor tweaks besides the delay between courses (See note above), you can duplicate the prebuilt Journey and make it your own! Just click "Duplicate" from the prebuilt Journey's page to get started.
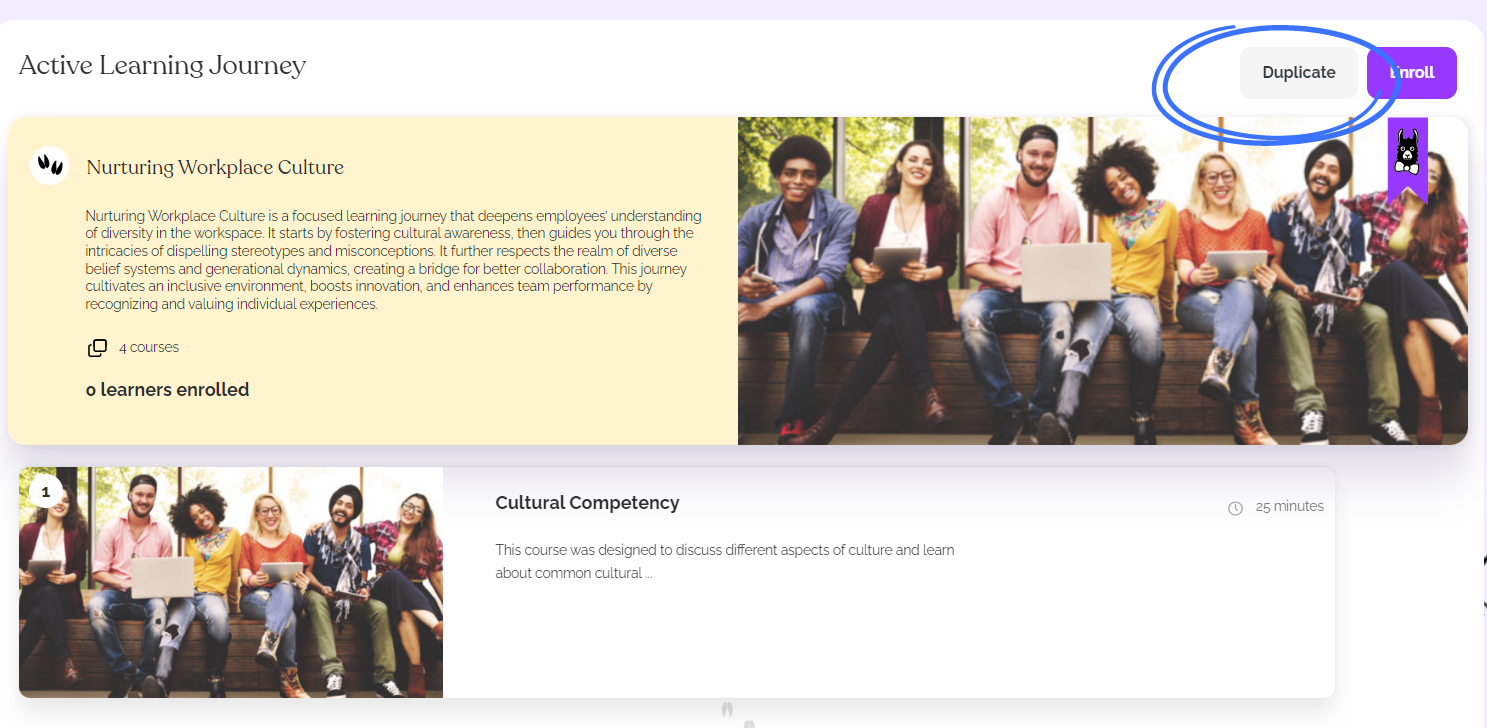
Once you have duplicated the Journey you can click "Edit" at the Top-right and make changes to the title, description, and even the thumbnail!
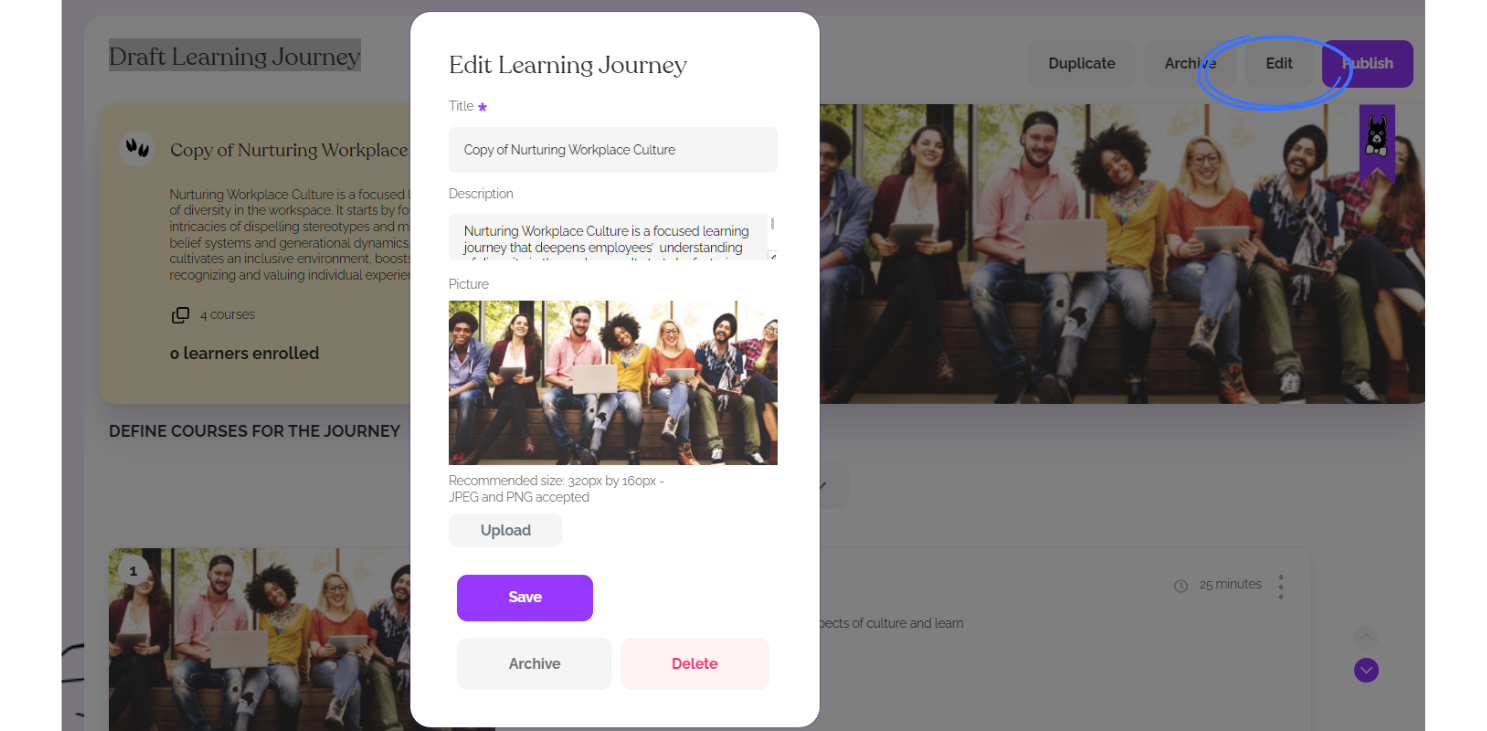
Once you have made your changes, click "Save" to proceed.
Now that you have a draft of your Journey, proceed to Section 2: Custom Learning Journey Options to see the options available to customize your Journey!
Creating a new Learning Journey from scratch
If none of the prebuilt courses are quite what you need, and you'd like to create an entirely new Journey for your Learners, you can start with a blank slate! From the Learning Journey's tab click "Create Learning Journey" to get started.
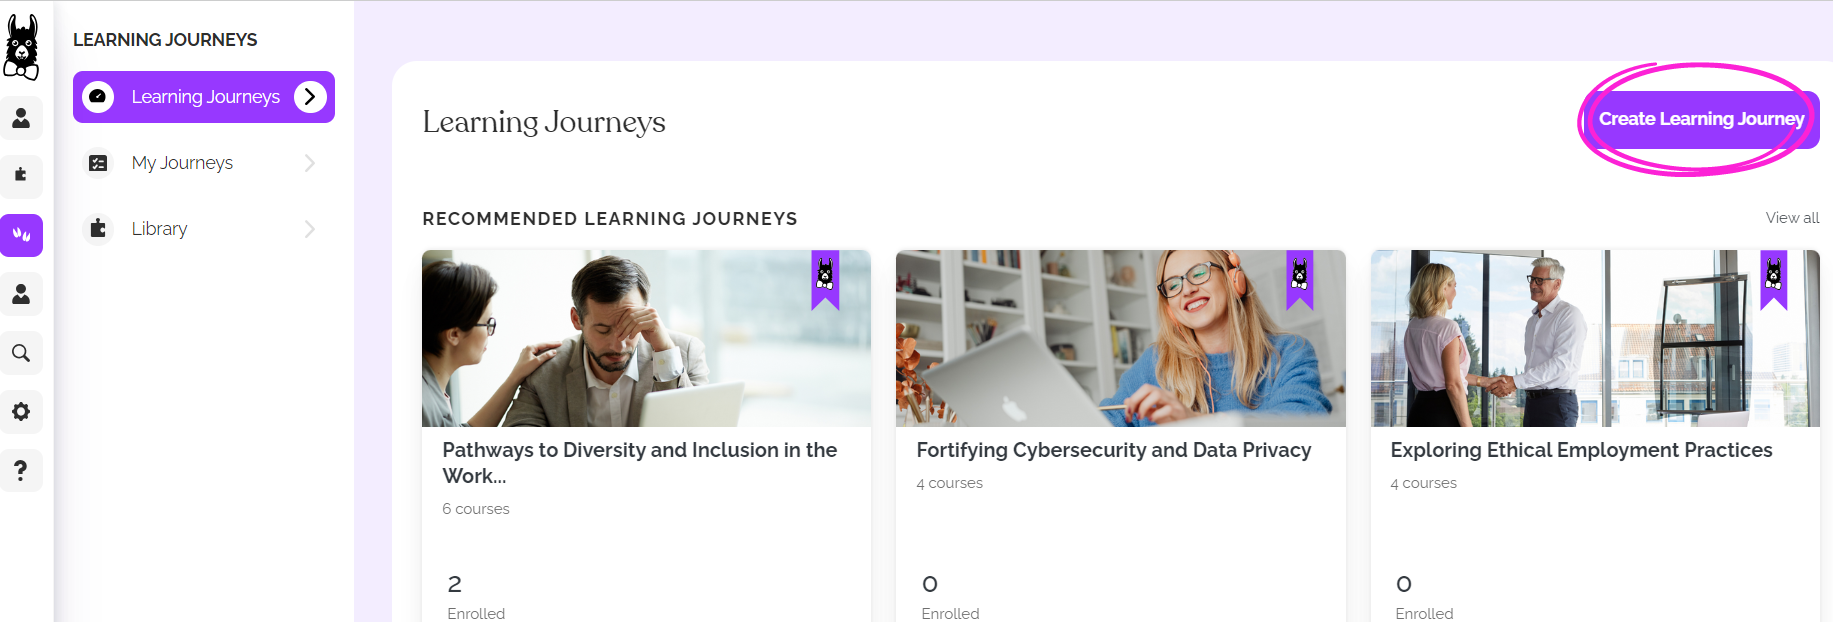
Now, give your Learning Journey a title and description, and upload a thumbnail if you'd like, then click "Save."

Now that you have a draft of your new Learning Journey, proceed to Section 2: Custom Learning Journey Options to see the options available to customize your new Journey.
Section 2: Customizing Your Journey: Options
There are many options available to tailor your custom Learning Journeys to the needs of your organization. Let's dive in!
Create and Organize the Course List
Courses can be added, removed, and reordered within your custom Journey.
Add a Course
To add a course, click here:

Then make your selections by checking the box next to the course(s) you'd like to add and click "Add Selections"
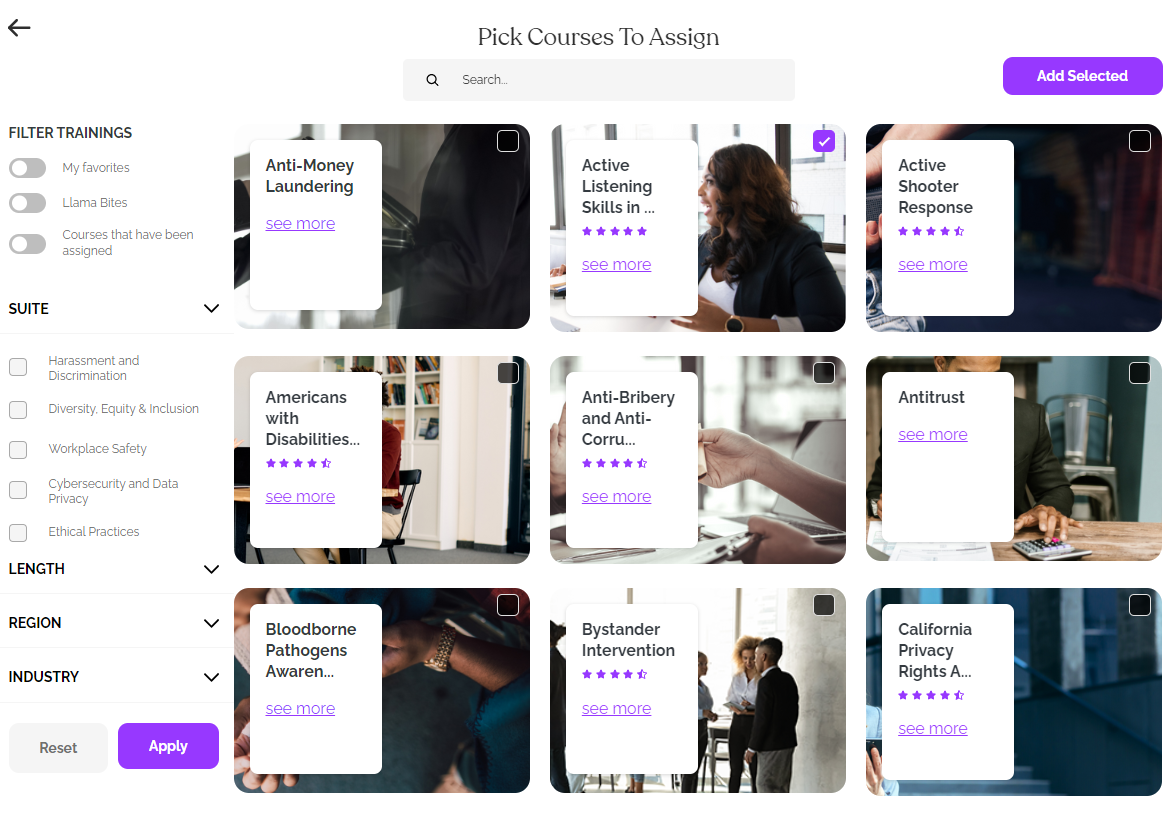
You can always add more courses by following the above steps again.
Remove a Course
To Remove a course, click on the three dots and "Delete" as shown below:

Reorder Courses
To change the order of your courses click on the purple up or down arrow to the right of the course and the course will move up or down in the sequence:
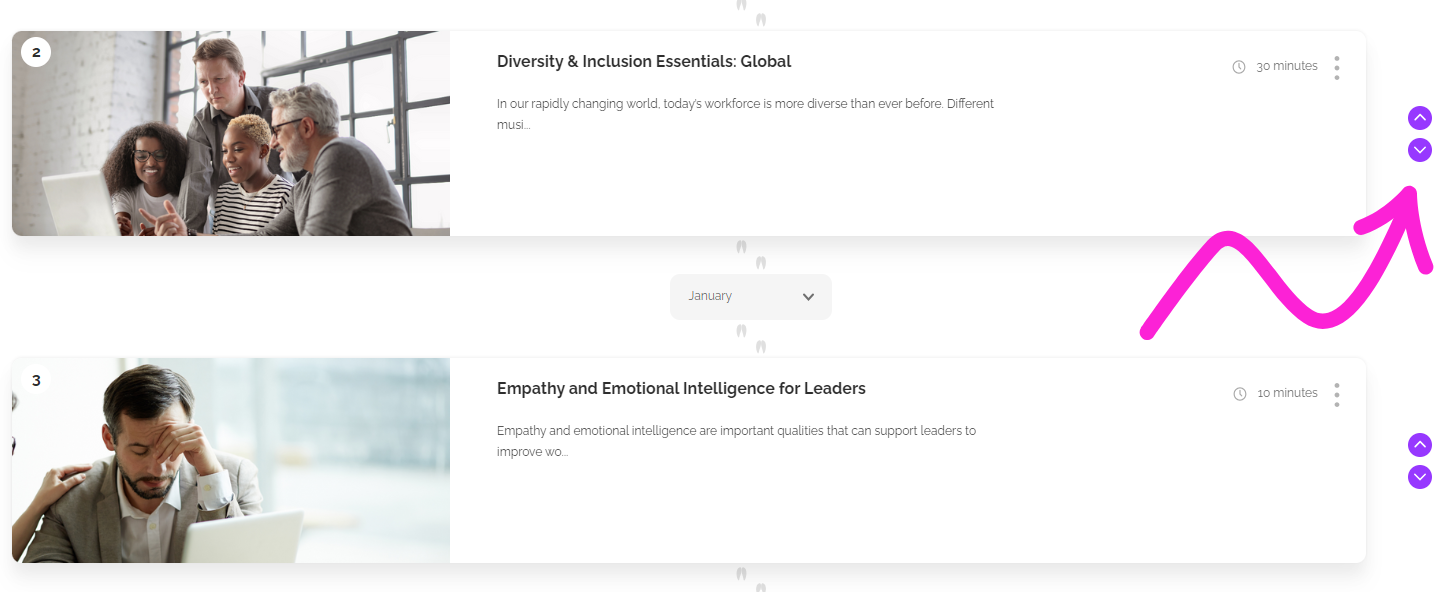
Course Assignment Timing
Now, let's choose the timing for course assignment. When enrolling a Learner, the first course in the Journey will be assigned immediately, but there will be options to delay notification and to customize the timing of subsequent courses.
The first timing setting is shown here - just click the dropdown at the top of the journey as seen below to get started:

Then choose one of the options:

- After course assignment: The assignment timing will be based on when the previous course was assigned to the learner.
- After course completion: The assignment timing will be based on when the learner completes the previous course.
This setting will work in conjunction with the timing setting you'll see between the courses in the Journey. Click on the dropdown here to choose the length of time between courses:

Here are the options if you chose After assignment or After course completion for the first timing option:
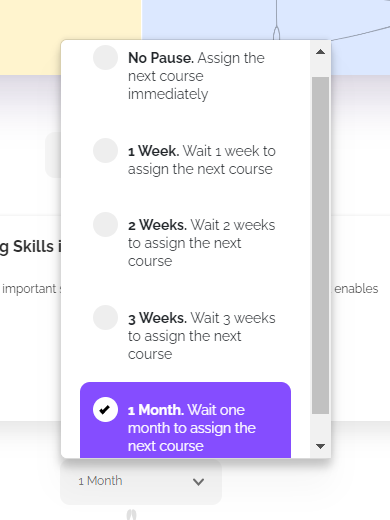
You'll need to adjust this setting after each course in the sequence - you'll see a dropdown under each course.
Here are some examples of how these two timing settings will work together.
If you choose After course assignment combined with No Pause the Learner will be assigned all of the courses immediately. If you choose After course assignment combined with 2 Weeks the Learner will be assigned the next course two weeks after the day you enrolled them in the Journey.
If you choose After course completion combined No Pause, the next course will be assigned immediately after the first one is completed.
If you choose After course completion combined with 1 week, the next course will be assigned one week after the first one is completed.
Publishing your Journey
Be sure to double-check that your courses and settings are customized to your specifications. You can click "Edit" at the top of the page if you want to make changes to the Title, Description, or Thumbnail. Once everything is perfect, click "Publish" to make your Journey available for enrollment.

Section 3: Enroll your Learners
Enrolling your Learners in a Learning Journey
There are two ways to enroll your Learners in a Learning Journey: from the Learning Journey's page or using Bulk Actions.
To Enroll through the Learning Journey page:
- From the Learning Journey tab, click on the Journey of your choice to be taken to its page.
- From the Journey's page click the Purple "Enroll" button at the top-right:

- Select the Learners you'd like to enroll. You may find them by scrolling or using the Search bar at the top-right, which also includes a filter button. When you have made your selections, click "Next" at the bottom.

- Choose when you would like to notify your Learners and then click "Enroll."

- That's it! The first course will be assigned and your Learners will be notified per your specifications and will be able to take the course by clicking the link they receive.
To Enroll using Bulk Actions:
- From the Learners tab of your dashboard, select the Learners you'd like to enroll in the Learning Journey by checking the boxes next to their names; the purple Bulk Actions bar will appear. Click the "More" dropdown and choose "Enroll in Learning Journeys:"
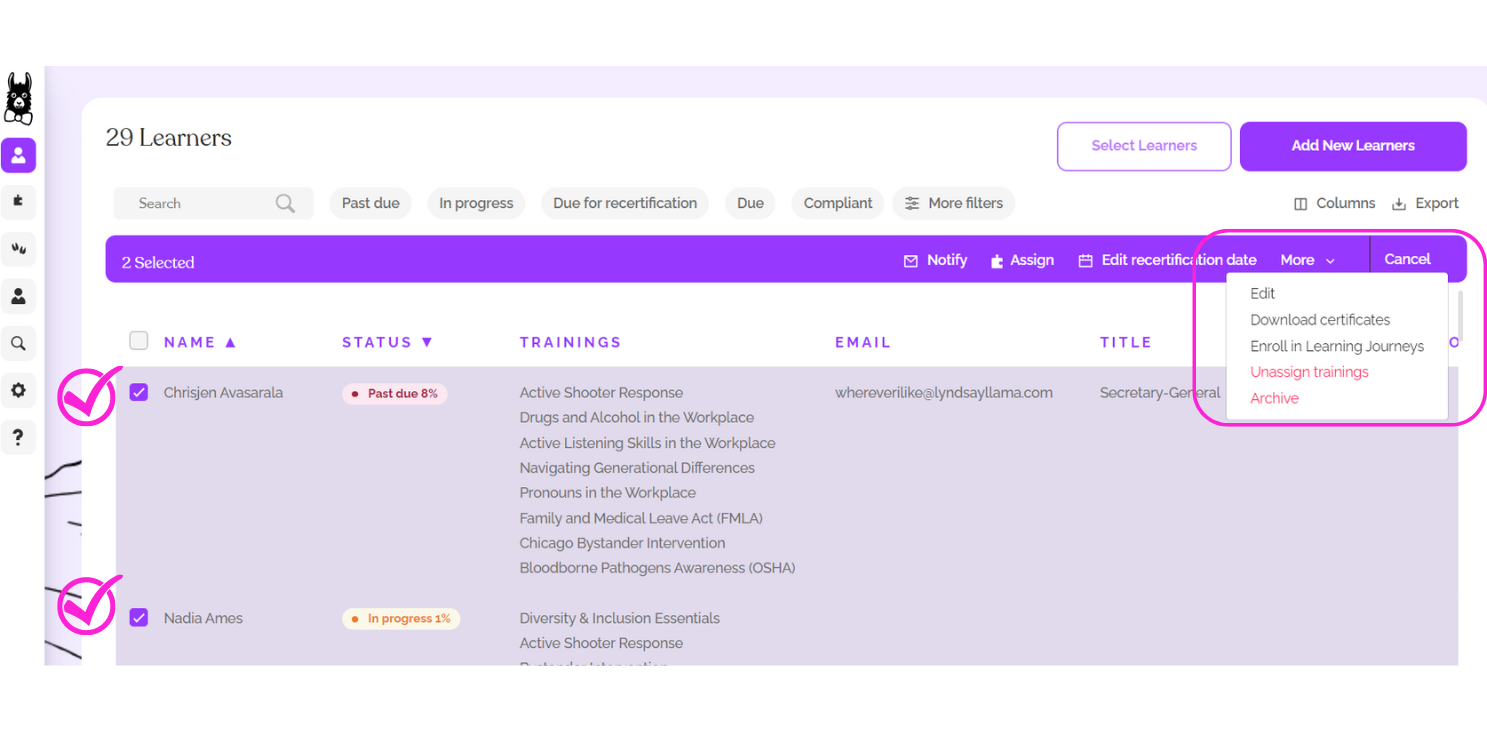
- Choose when you would like to notify your Learners and then click "Enroll."
- That's it! Your Learners will be notified per your specified settings and will be able to take the course by clicking the link they receive.
🦙Fun Llama Fact: Llamas communicate with a unique humming sound. This gentle humming can express various emotions, such as contentment, curiosity, or concern.
