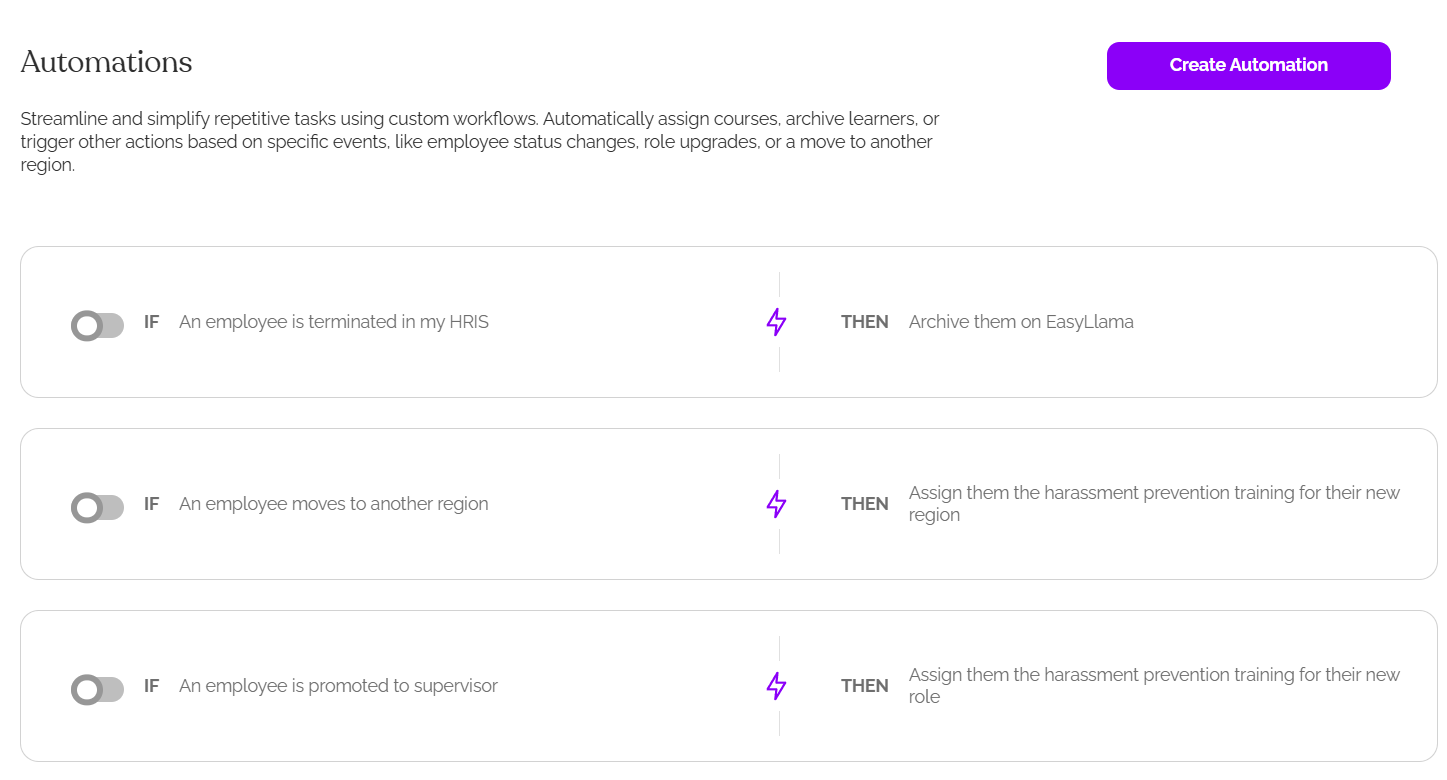
With Integrations, there have always been standard automations to automatically assign training to new Learners, archive terminated Learners, and assign Supervisor Harassment Prevention training when Learners are promoted or regional training when Learners move to a new region. With Automations, available only to Premium subscribers, you can now create custom automations based on departments, regions, locations, and more!
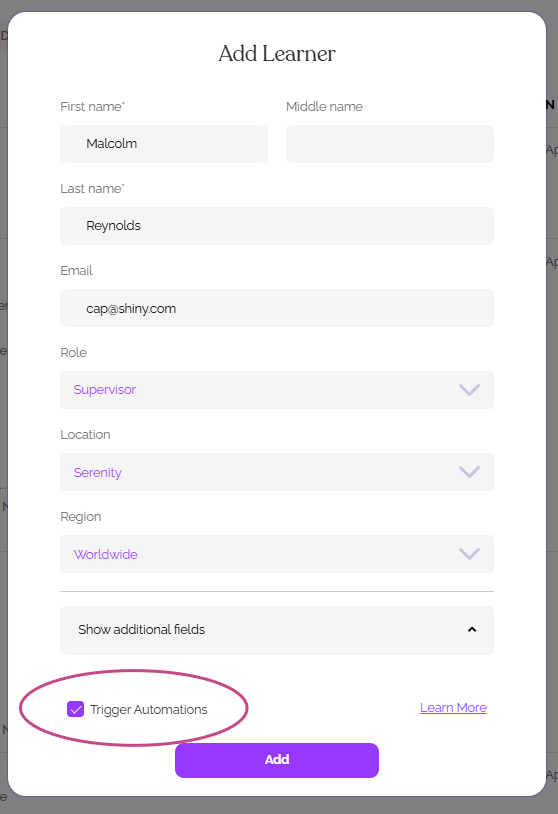
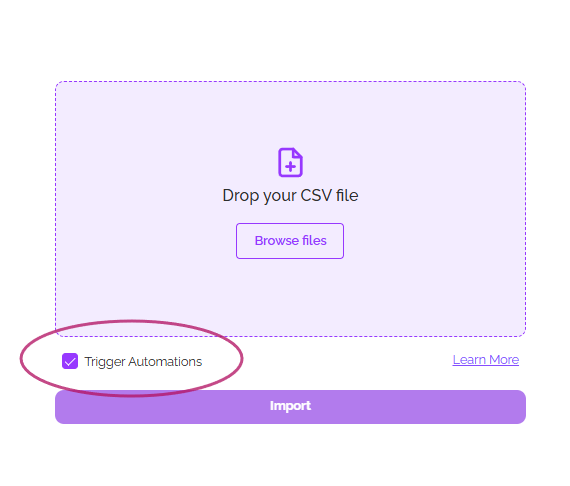
These automations can also be applied to Learners who are added manually or by file upload in addition to being added by an integration by checking a box when adding them!
To find your Automations, go to Settings > Automations in your EasyLlama dashboard. There you will see the standard automations, which are available to all subscription levels and can be toggled on or off.
Pro Tip: If you intend to create a custom automation with the same function as the standard automations, be sure to turn them off if they will conflict! This also applies to auto-assigned training.
Steps to Create a Custom Automation
To get started, click "Create automation" at the top right of the Automations tab.
1. Select a Trigger
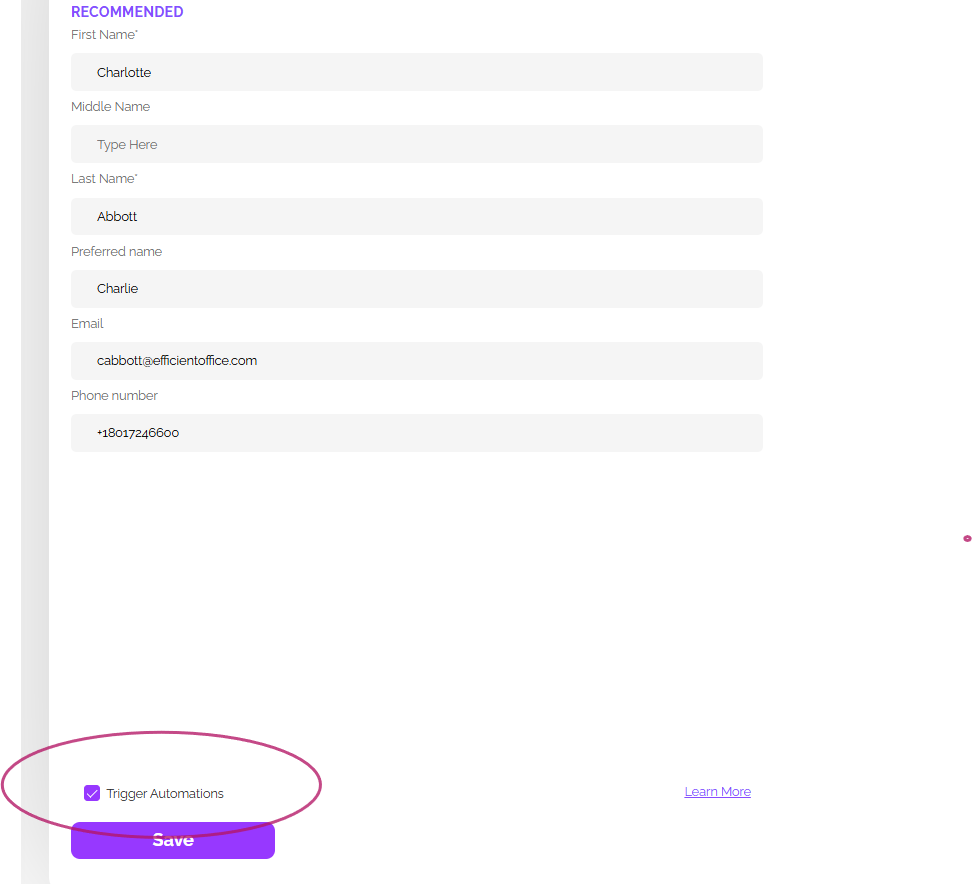
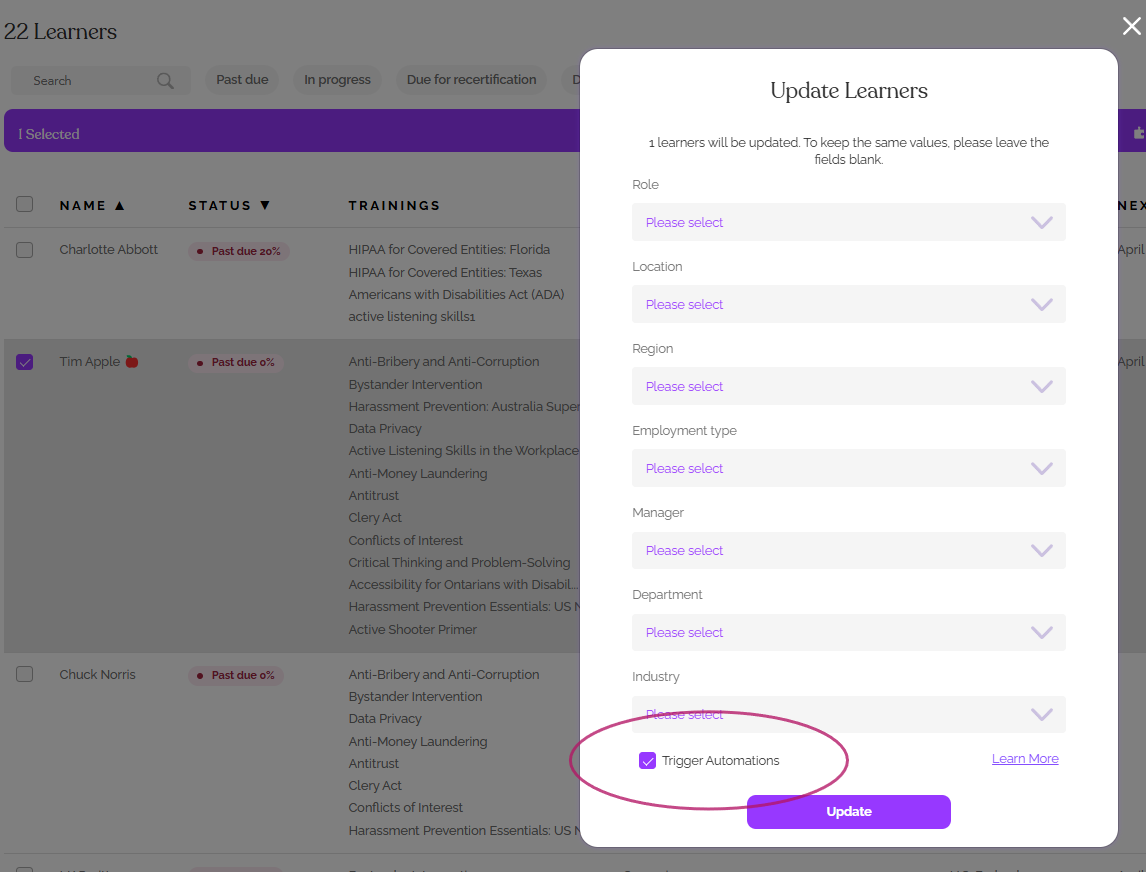
The trigger is the action that starts the automation. It will be executed automatically when there's an update through your HRIS. It can also apply if a box is checked when adding or updating Learners manually or by file upload. See pictures below for checkbox locations.
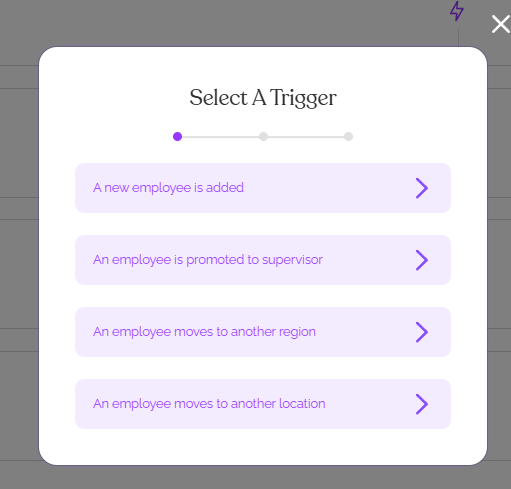
Your trigger options are:
- A new employee is added - When a brand new Learner is added by your integration, manually, or by file upload. When adding as Learner manually or by file upload, there will be a box that is checked by default to trigger automations.
- An employee is promoted to supervisor - If your Learner is promoted to a supervisor
- An employee moves to another region
- An employee moves to another location
Examples of Trigger checkboxes:
When adding a Learner manually:
When uploading a file:
When editing a single Learner:
When bulk editing Learners:
2. Add Conditions
Conditions are qualifiers that decide whether the automation should apply to the learner based on the following characteristics. The learner must meet ALL conditions outlined in this step. You may leave any field blank. If you leave all fields blank the trigger will apply to all learners.
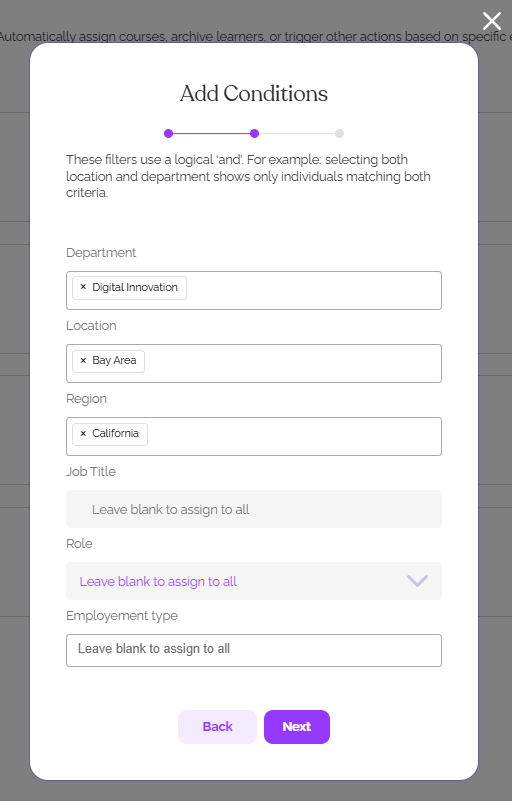
Possible conditions:
- Department
- Location
- Region
- Job title
- Role
- Employment Type
3. Select an Assignment
An assignment can be any course, journey, or document.
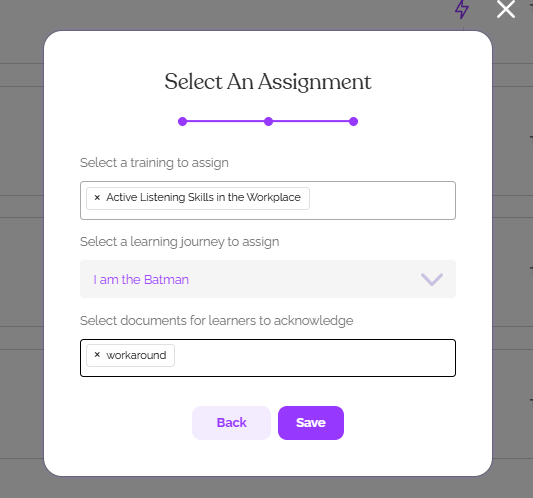
Once you have selected your assignments, click "save" - that's it! your Automation is live.
Temporarily Disabling and Reenabling an Automation
To disable an automation without archiving it permanently, simply go to Settings > Automations and click the toggle button
Purple = "On"

Grey = "Off"

Editing or Permanently Deleting an Automation
To edit or remove an automation, simply go to Settings > Automations and click the three dots to the right of the automation to see these options:
Edit: To edit, choose "Edit" and go through the same steps used when creating the automation, making changes as you go, and then saving.
Archive: To archive, choose "Archive." Your automation will be permanently removed.
