Before You Start
What You'll Need
- Access to the Course Customization Builder (upgrade if needed)
- Workplace Violence Prevention Plan specific to each location (or use our template)
- Locations set up in your EasyLlama dashboard (recommended for auto-assignment)
- Downloaded Customization Worksheet (highly recommended)
Helpful Resources
- Video Overview: California Workplace Violence Prevention Course Customization Builder
- Plan Template*: Download template – save a copy and edit with your organization's details
- Customization Worksheet: Download worksheet – highly recommended for organizing your plan information
*Note on Template: The template is intended as an example. You may use any pre-filled parts if you wish, or replace text with your own. Please read all prefilled text to ensure it makes sense for your organization.
Customize the Workplace Violence Prevention Course
Step 1: Access the Course
- Log in to the EasyLlama dashboard
- Go to the Training Library tab
- Find the Workplace Violence Prevention: CA - Customizable course and click on it.
- Click the purple Start Customization button at the top-right

If you haven't upgraded to add the Builder to your account, you'll have the opportunity to do so now by clicking "Upgrade" .
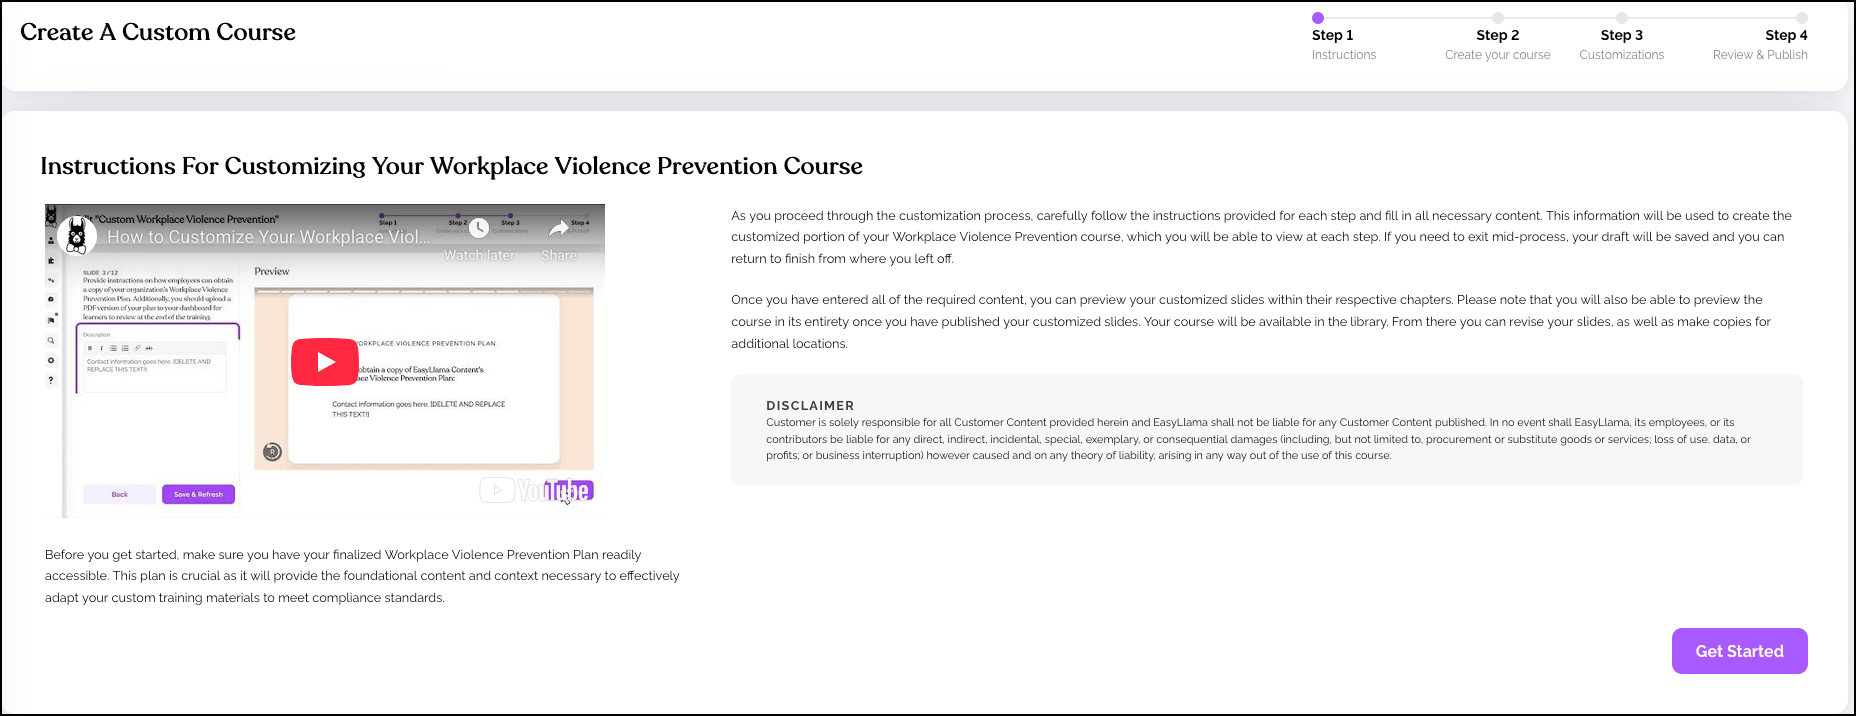
Step 2: Begin Customization
- Carefully read all instructions provided
- Click Get Started to proceed
Step 3: Configure Course Details
Course Name: Enter a name for the course. If you have multiple business locations, consider naming each version accordingly (e.g., "Workplace Violence Prevention - San Francisco Office").
Locations (Optional but Recommended):
- Select relevant locations from the drop down menu for this course version
- Click Add Another Location to create a new location if needed
- After creating a new location, click "Refresh location list" to make it available in the drop down
Why Locations Matter:
- If using an integration to import learners and want to auto-assign this course
- Learners need:
- Region: California
- Location: Associated with this course
For more details, see: Locations Feature
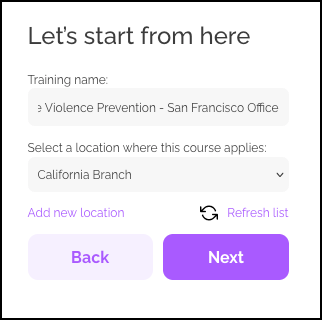
Proceed: Click Next when finished.
Step 4: Customize Course Content
The Builder will guide you through adding information from your:
- Workplace Violence Prevention Plan
- Completed Customization Worksheet
You can preview the content your learners will see and hear on each slide as you go.
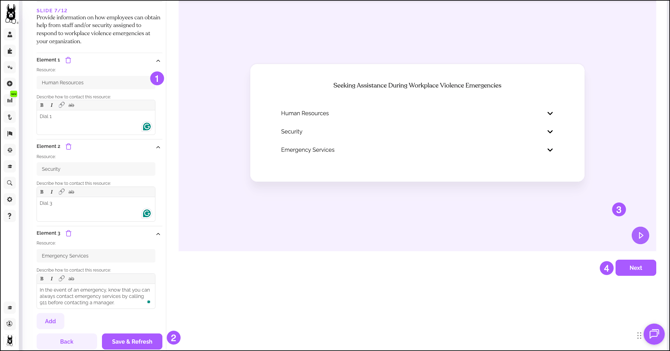
Step 5: Edit Each Slide
For each slide:
- Replace text in each text box with your plan's information. Delete sample text completely.
- Save & Refresh at the bottom of each step to update
- Preview the slide to ensure it appears how you want it to
- Click Next to continue to the next slide
When you finish updating all slides, if you do not currently have our Anonymous Reporting tool you are presented with the following screen:
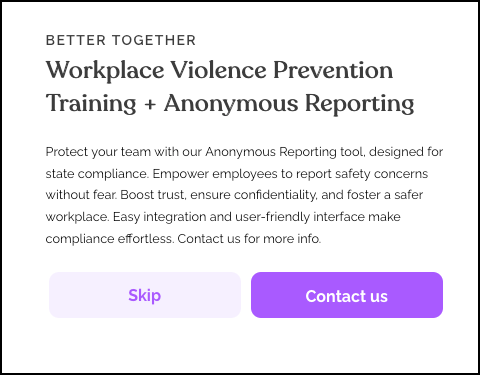
Click Skip to proceed. If you click Contact us, a new tab opens. When you’re ready to proceed, go back to the Edit Screen and click Skip.
Step 6: Preview and Publish
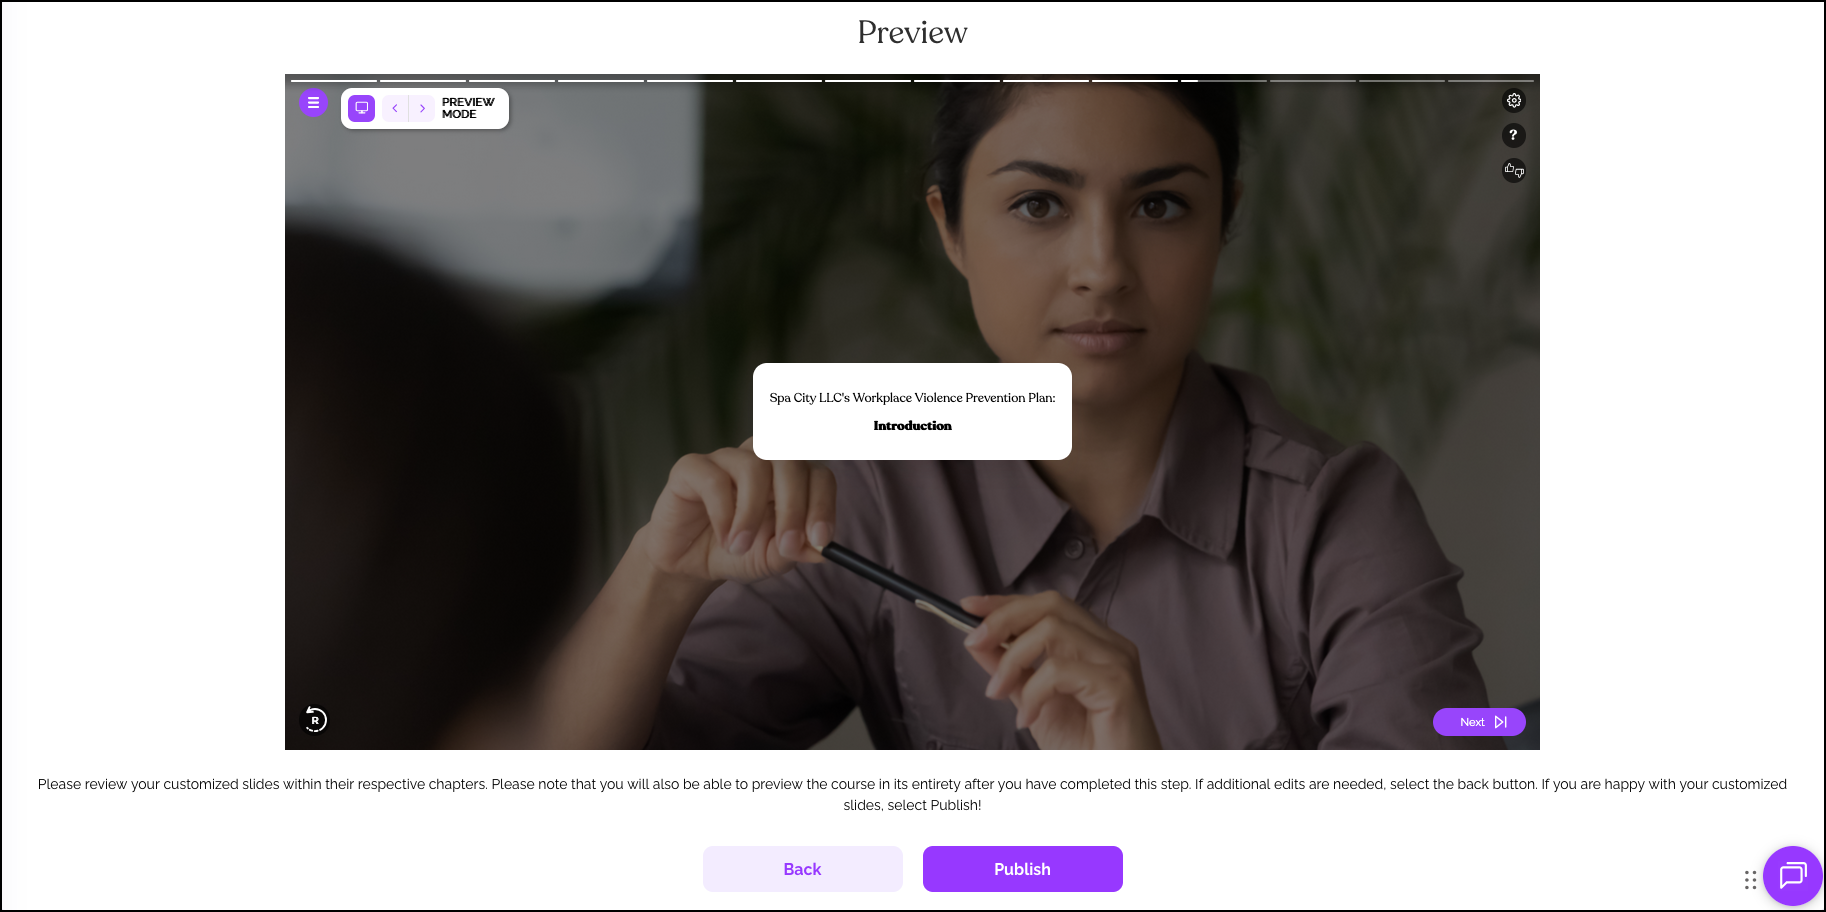
Preview:
- After completing all slides, you'll be prompted to preview the customized content
- Click the play button at the bottom-right of the preview window
- This shows the chapters where your customized content will appear (not the full course beginning)
If everything looks good:
- Click Publish to publish the course and start assigning it
If changes are needed:
- Click "Back" to return and make edits
- Repeat steps as needed
Note on Preview: When previewing in the Course Builder or via "Send Preview," you'll see EasyLlama dashboard names and logos where you would expect to see your own. These parts will automatically personalize to your company name and logo once you have a logo uploaded.
Step 7: Upload Your Plan Document
To ensure learners can access your complete Workplace Violence Prevention Plan:
- Click Compliance Hub > Document Management in your dashboard
- Click Upload Document to upload a copy of your plan document
- Important: Apply the document to your customized course(s) , not the generic Workplace Violence courses
- If you have multiple documents, repeat the process for each, ensuring all are connected to the course
Learners will be able to:
- Download the plan at the end of the course
- Access it in the Learner Portal
Managing Customized Courses
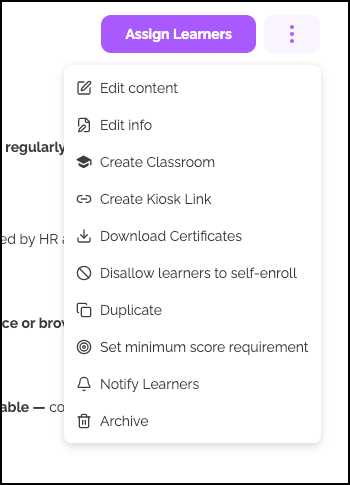
To manage customized courses, find and click on the customized course from the Training Library. You can then:
Edit Slides
If your plan changes (procedures, contact persons, etc.):
- Navigate to the course in the Training Library
- Click the three dots (⋮) to the right of the Send Preview button
- Choose Edit Slides
Edit Course Info
To change title, description, or other details:
- Click the three dots (⋮)
- Choose Edit Info
Duplicate for Another Location
To create a copy for a different location:
- Click the three dots (⋮)
- Choose Duplicate
Archive Course
To remove from your library:
- Click the three dots (⋮)
- Choose Archive
Finding and Assigning Your Customized Course
Use the same method as assigning any course.
Quick find: In the Training Library or during assignment flow, filter for "My custom courses" to easily locate your customized versions.
Best Practices
Before You Start
- Complete the Customization Worksheet first—it makes the process much smoother
- Have your Workplace Violence Prevention Plan ready for each location
- Set up Locations in your dashboard if you plan to auto-assign
During Customization
- Read all sample text carefully before replacing—ensure retained text fits your organization
- Use the "Save & Refresh" feature frequently to check your work
- Test the published course with a small group before broad rollout
After Publishing
- Upload all related plan documents to Document Management
- Verify document connections to the correct course versions
- Communicate with learners about the new training
Helpful Tips
Use and refer to the worksheet
The Customization Worksheet is highly recommended. Trying to customize without it is much more difficult.
Remember to delete sample text
Always delete sample text completely and replace with your own. Leftover sample text can confuse learners.
Be sure to upload the plan document
The course integrates your plan information, but learners also need access to the full document. Always upload it.
Be sure to apply documents to the correct custom courses
When uploading your plan, ensure it's attached to your customized course(s) , not the generic Workplace Violence courses.
Do not skip the preview
Always preview your customized course before publishing to catch any errors.
What's Next?
- Assign your customized course to learners
- Set up auto-assignment via locations
- Track completion in Insights
Quick Questions
Can I create different versions for different locations?
Yes! The Builder is designed for this. Create separate customized courses for each location by naming them appropriately and selecting the relevant location from the drop down.
What if I need to update my plan after publishing?
You can edit the course slides anytime using the "Edit Slides" option in the three-dots menu. Update the information and republish.
Do I have to use the template?
No. The template is provided as a helpful starting point. You can use your own plan as long as it meets SB 553 requirements.
How do learners access the full plan document?
After you upload it to Document Management and attach it to the course, learners can download it at the end of the course and access it in the Learner Portal.
Llama Fact: Llamas are naturally alert and protective of their herd—similar to how a well-implemented Workplace Violence Prevention Plan helps protect your workforce!